

Detailed Results
Full result detail for a test run, including tester comments, attachments, and linked issues
The Detailed Results report gives you the complete record of what happened in a test run. Where View Results answers "what is the current status?", Detailed Results answers "what exactly did the tester see, and what did they attach?" — every comment, every screenshot, and every linked issue, in one document.
What This Report Shows
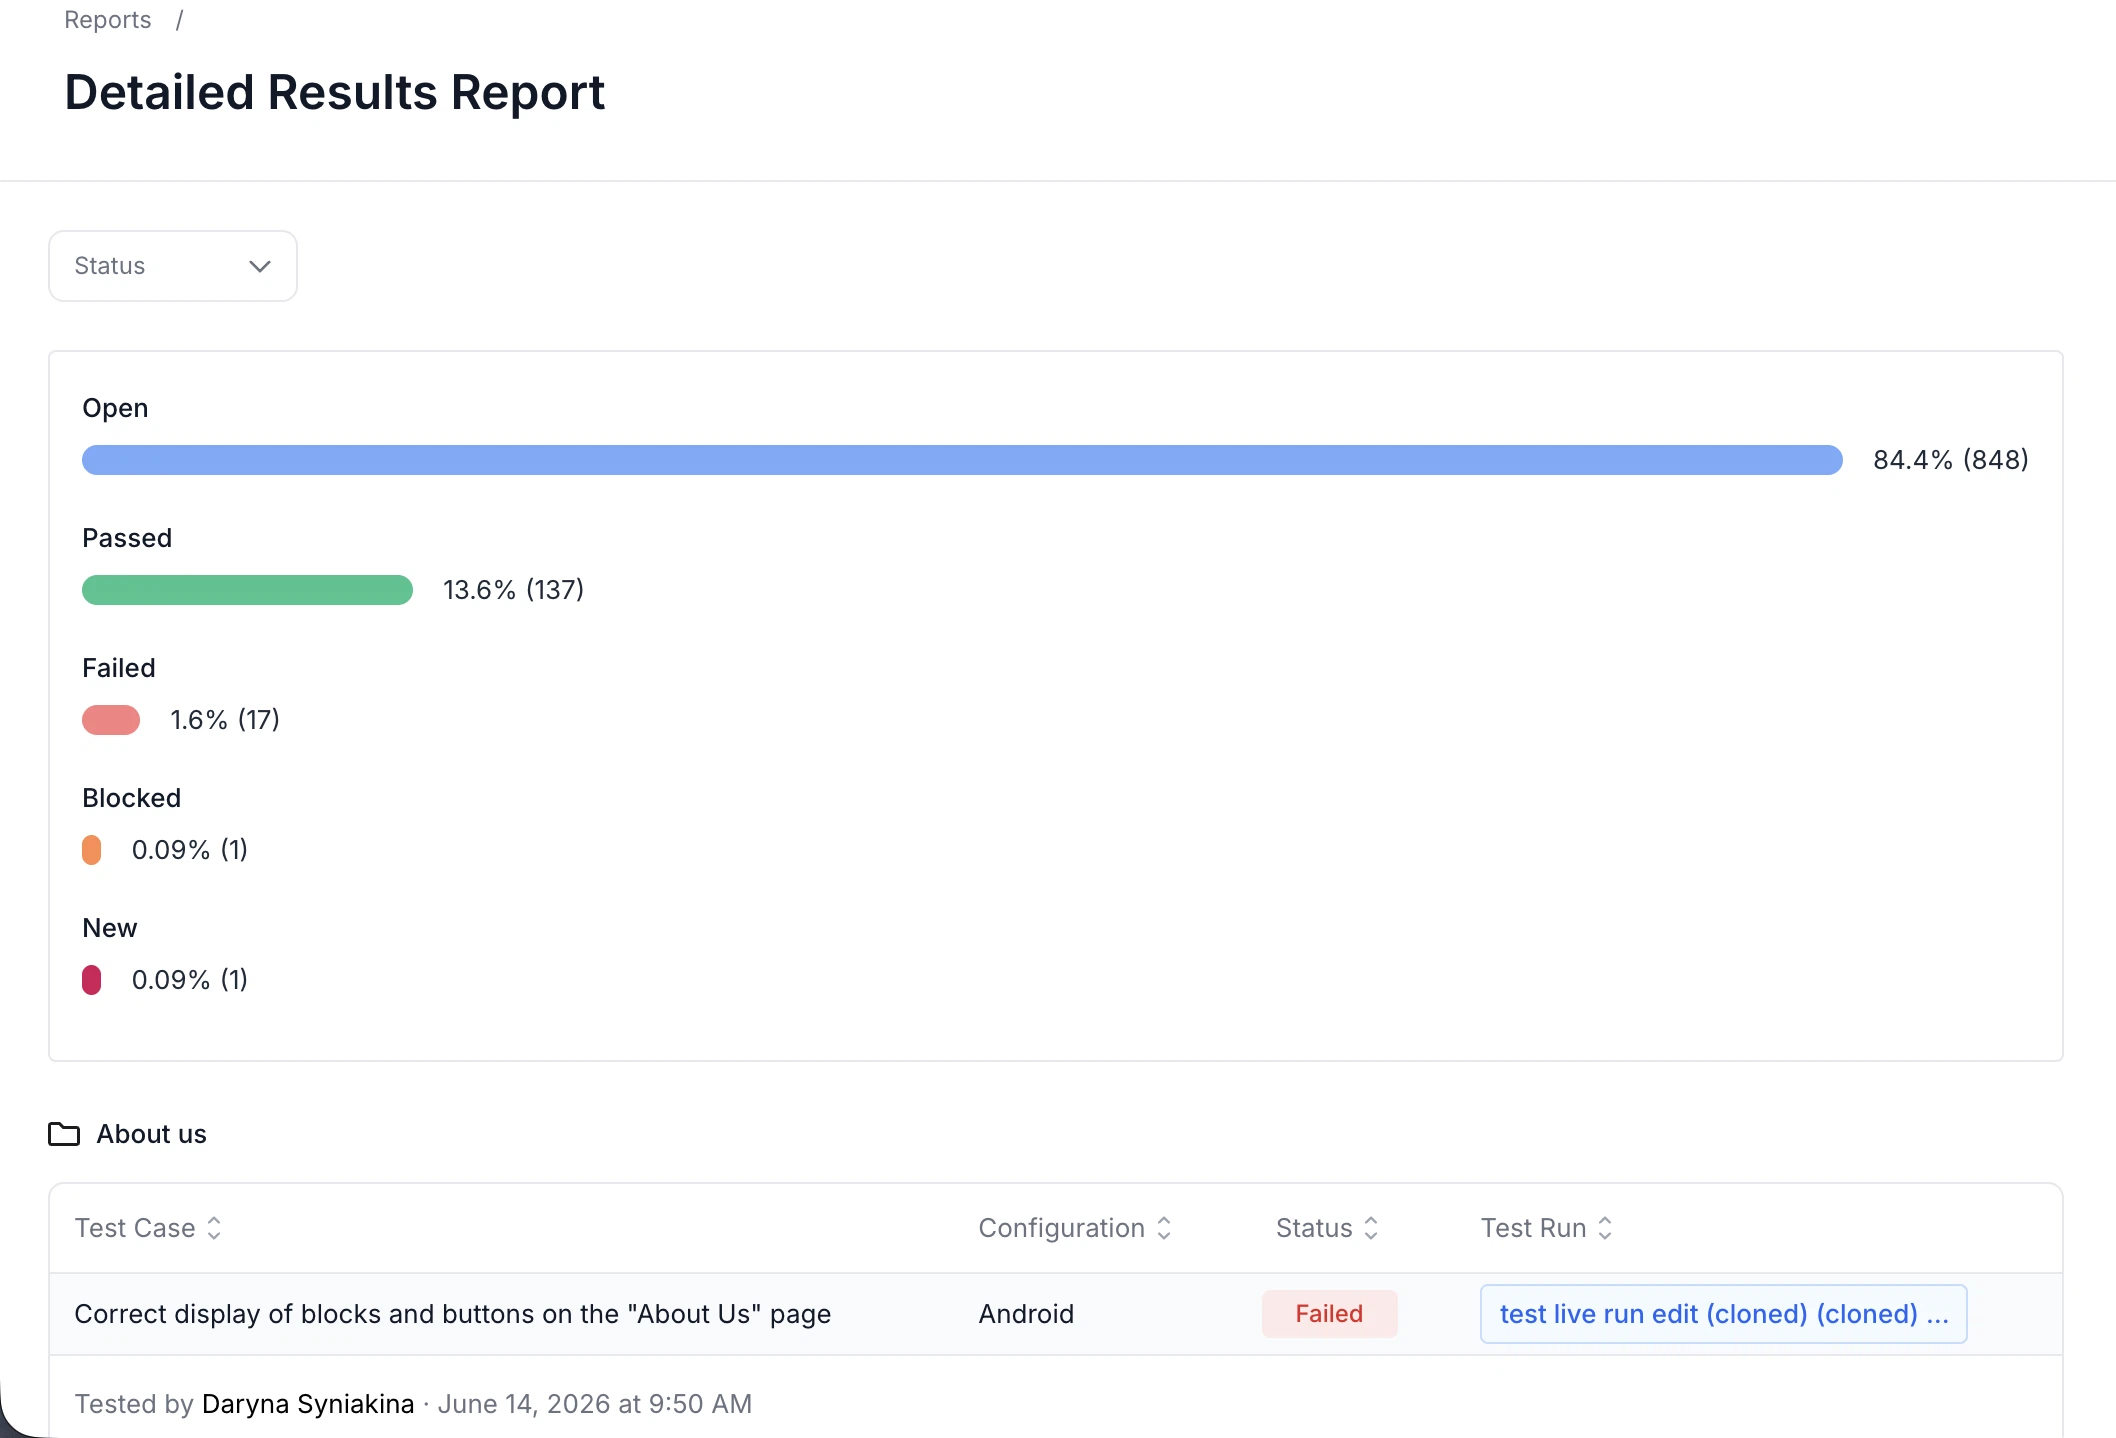
For each test case in the selected run, the report includes:
- Result status — one of the five default statuses (Passed, Failed, Blocked, Open, Skipped) or any of the up to four custom statuses configured for your workspace
- Tester comments — the notes the tester wrote when recording the result
- Attachments — screenshots, videos, logs, and other files attached to the result
- Linked issues — bugs created or linked from the result, shown as clickable tags into your issue tracker
- Who and when — the tester who recorded the result and the time it was recorded
When to Use This Report
Use Detailed Results when the status alone is not enough:
- Defect triage — hand developers the failure evidence without asking them to click through the app
- Handover between shifts or teams — one document that carries the full context of a run
- Audit and compliance evidence — a durable record of what was executed, by whom, and what was observed
- Retrospectives — review how failures were described and whether the reporting was actionable
- Customer or stakeholder reporting — share the substance of a test cycle, not just a pass rate
The report shows whichever status was actually recorded, so a workspace using custom statuses will see those here under their configured labels. Custom statuses are configured per workspace and appear in the API as custom1 through custom4 — see Settings.
Detailed Results is scoped to a test run, so it is at its most useful right after a run closes, while the evidence still matters. For trends across many runs, use Test Case Success Rate or Run Scorecard instead.
Generating the Report
- Open your QA Sphere project
- Click Reports in the top navigation
- Click Build report
- Select Detailed Results and click Next
- Choose the test run to report on
- Click Build report
Export Options
Like the other reports, Detailed Results can be exported from the ... menu:
- Export PDF — the full report with comments and inline attachments, suited to release documentation and audit trails
- Export XLSX — the underlying rows for analysis in Excel, Google Sheets, or a BI tool
- Print — direct print, formatted for standard paper sizes
Attachments are embedded as images in the PDF export where the file type allows it. Large videos and archives are referenced rather than embedded, so keep the run available in QA Sphere if the attachments themselves need to be retrievable later.
Getting the Most Out of It
Write comments the report can carry. The value of this report is bounded by the quality of the comments testers leave. A comment like "broken" produces a useless row; "Checkout fails with 500 after applying a expired promo code, see attached HAR" produces an actionable one.
Attach evidence at the moment of failure. Attachments are captured per result, so a screenshot taken while the failure is on screen ends up in the right row automatically. Automated runs can push attachments too — see Result Upload and use the --attachments flag.
Link the issue from the result, not afterwards. Issues created from the result view are linked to that specific result, which is what makes them appear here. Issues filed separately in Jira or GitHub will not show up in this report even if they describe the same bug.
Related Reports
- View Results — the latest result per test case across one or more runs
- Run Scorecard — compare several runs side by side
- Traceability — map results back to requirements
Getting Help
For assistance with this report:
- Review the report parameters to ensure correct configuration
- Check the Reports Overview for general guidance
- Contact QA Sphere support: sorted@qasphere.com