

Users and Permissions
Users and Permissions
Effective user management and role-based access control are crucial for maintaining security and efficiency in your QA processes. QA Sphere offers a flexible and robust permissions system that allows you to fine-tune access levels for each member of your team. This guide will walk you through the various roles available in QA Sphere and how to manage them.
Understanding QA Sphere Roles
QA Sphere provides five distinct roles, each with its own set of permissions and responsibilities. These roles are designed to cater to different levels of involvement and authority within your QA process.
1. Owner
The Owner role is the highest level of authority in QA Sphere.
Key Characteristics:
- There can only be one Owner per QA Sphere instance.
- The Owner is typically the first user who set up the QA Sphere account.
- This role cannot be deleted.
Permissions:
- Has unrestricted access to all features and settings.
- Can change anything within the system.
- Can assign the Owner role to another user (in which case, the current Owner becomes an Admin).
Best Practices:
- Reserve this role for the highest level of management or the primary stakeholder of the QA process.
- Consider transitioning to an Admin role once the system is set up and stable, to reduce the risk of accidental system-wide changes.
2. Admin
The Admin role is designed for users who need comprehensive control over the QA Sphere instance, but with some limitations compared to the Owner.
Permissions:
- Can change almost anything in the system.
- Has access to all projects and global settings.
- Can manage users, including creating new users and assigning roles.
- Cannot delete the Owner or change the Owner's permissions.
Best Practices:
- Assign this role to QA managers or team leads who need to oversee multiple projects and manage team members.
- Limit the number of Admins to maintain better control and security.
3. User
The User role is suitable for team members actively involved in the QA process across one or more projects.
Permissions:
- Can work on specific projects or all projects (as assigned by an Admin or Owner).
- Can create and manage test runs, milestones, and test cases within their assigned projects.
- Cannot add new projects, rename/complete/delete projects, manage users, or change global settings.
Best Practices:
- This should be the default role for most team members involved in creating and executing tests.
- Regularly review User project assignments to ensure they have access to all necessary projects.
4. Test Runner
The Test Runner role is designed for team members primarily responsible for executing test runs.
Permissions:
- Can work on test runs of specific projects (or all projects, as assigned).
- Can update test run status and results.
- Cannot modify test cases or create new ones.
- Cannot change project settings or manage users.
Best Practices:
- Assign this role to team members focused on test execution, such as QA testers or automated testing systems.
- Ensure Test Runners have clear guidelines on how to report and document test results.
5. Viewer
The Viewer role provides read-only access to QA Sphere, suitable for stakeholders who need to monitor progress but should not make changes.
Permissions:
- Can view information in specific projects or all projects (as assigned).
- All access is read-only; cannot make any changes to test cases, runs, or settings.
Best Practices:
- Use this role for external stakeholders, clients, or team members who need to stay informed but are not directly involved in the QA process.
- Regularly review Viewer access to ensure they only have visibility to relevant projects.
Viewer seats are unlimited and free on paid plans. Stakeholders who only need to follow quality status should be Viewers — they do not count toward your per-user bill. See Billing.
Project Access
A role decides what a user can do; project access decides where they can do it. Users, Test Runners, and Viewers are granted access either to all projects or to a specific set of projects, chosen when you invite them and changeable at any time from Settings → Members.
Owners and Admins always have access to every project, so project access does not apply to them.
The Access column in the Members table shows each user's current scope, and the table can be sorted by it — useful when reviewing who can reach a sensitive project.
Managing Users and Permissions
As an Owner or Admin, you have the responsibility of managing users and their permissions. Here's how to effectively manage your team in QA Sphere:
-
Adding New Users:
- Navigate to the Settings
 > Members.
 - Use Email field to invite new users to the team
- Assign the appropriate role and project access and click Send Invite.
- Navigate to the Settings
-
Modifying User Roles:
- Navigate to the Settings > Members.
- Click

- Change Role in the appropriate field
- Navigate to the Settings
-
Reviewing the Member List:
- The Members table can be sorted by Name/Email, Role, 2FA, and Access. Sorting cycles ascending → descending → reset, and the indicators stay visible.
- Sorting by 2FA is the quickest way to see who has not yet enrolled, which matters before you enforce two-factor authentication.
-
Best Practices for User Management:
- Regularly audit user roles and permissions to ensure they align with current responsibilities.
- Implement a process for reviewing and updating permissions when team members change roles.
- Use groups to manage permissions for multiple users with similar roles more efficiently.
- Always follow the principle of least privilege: give users only the permissions they need to perform their tasks.
Suspending and Restoring Access
When someone should lose access but their history should be kept, suspend them instead of deleting the account. A suspended user cannot sign in, while everything they authored — test cases, runs, results, and audit history — stays intact and correctly attributed. Restoring access is a single action.
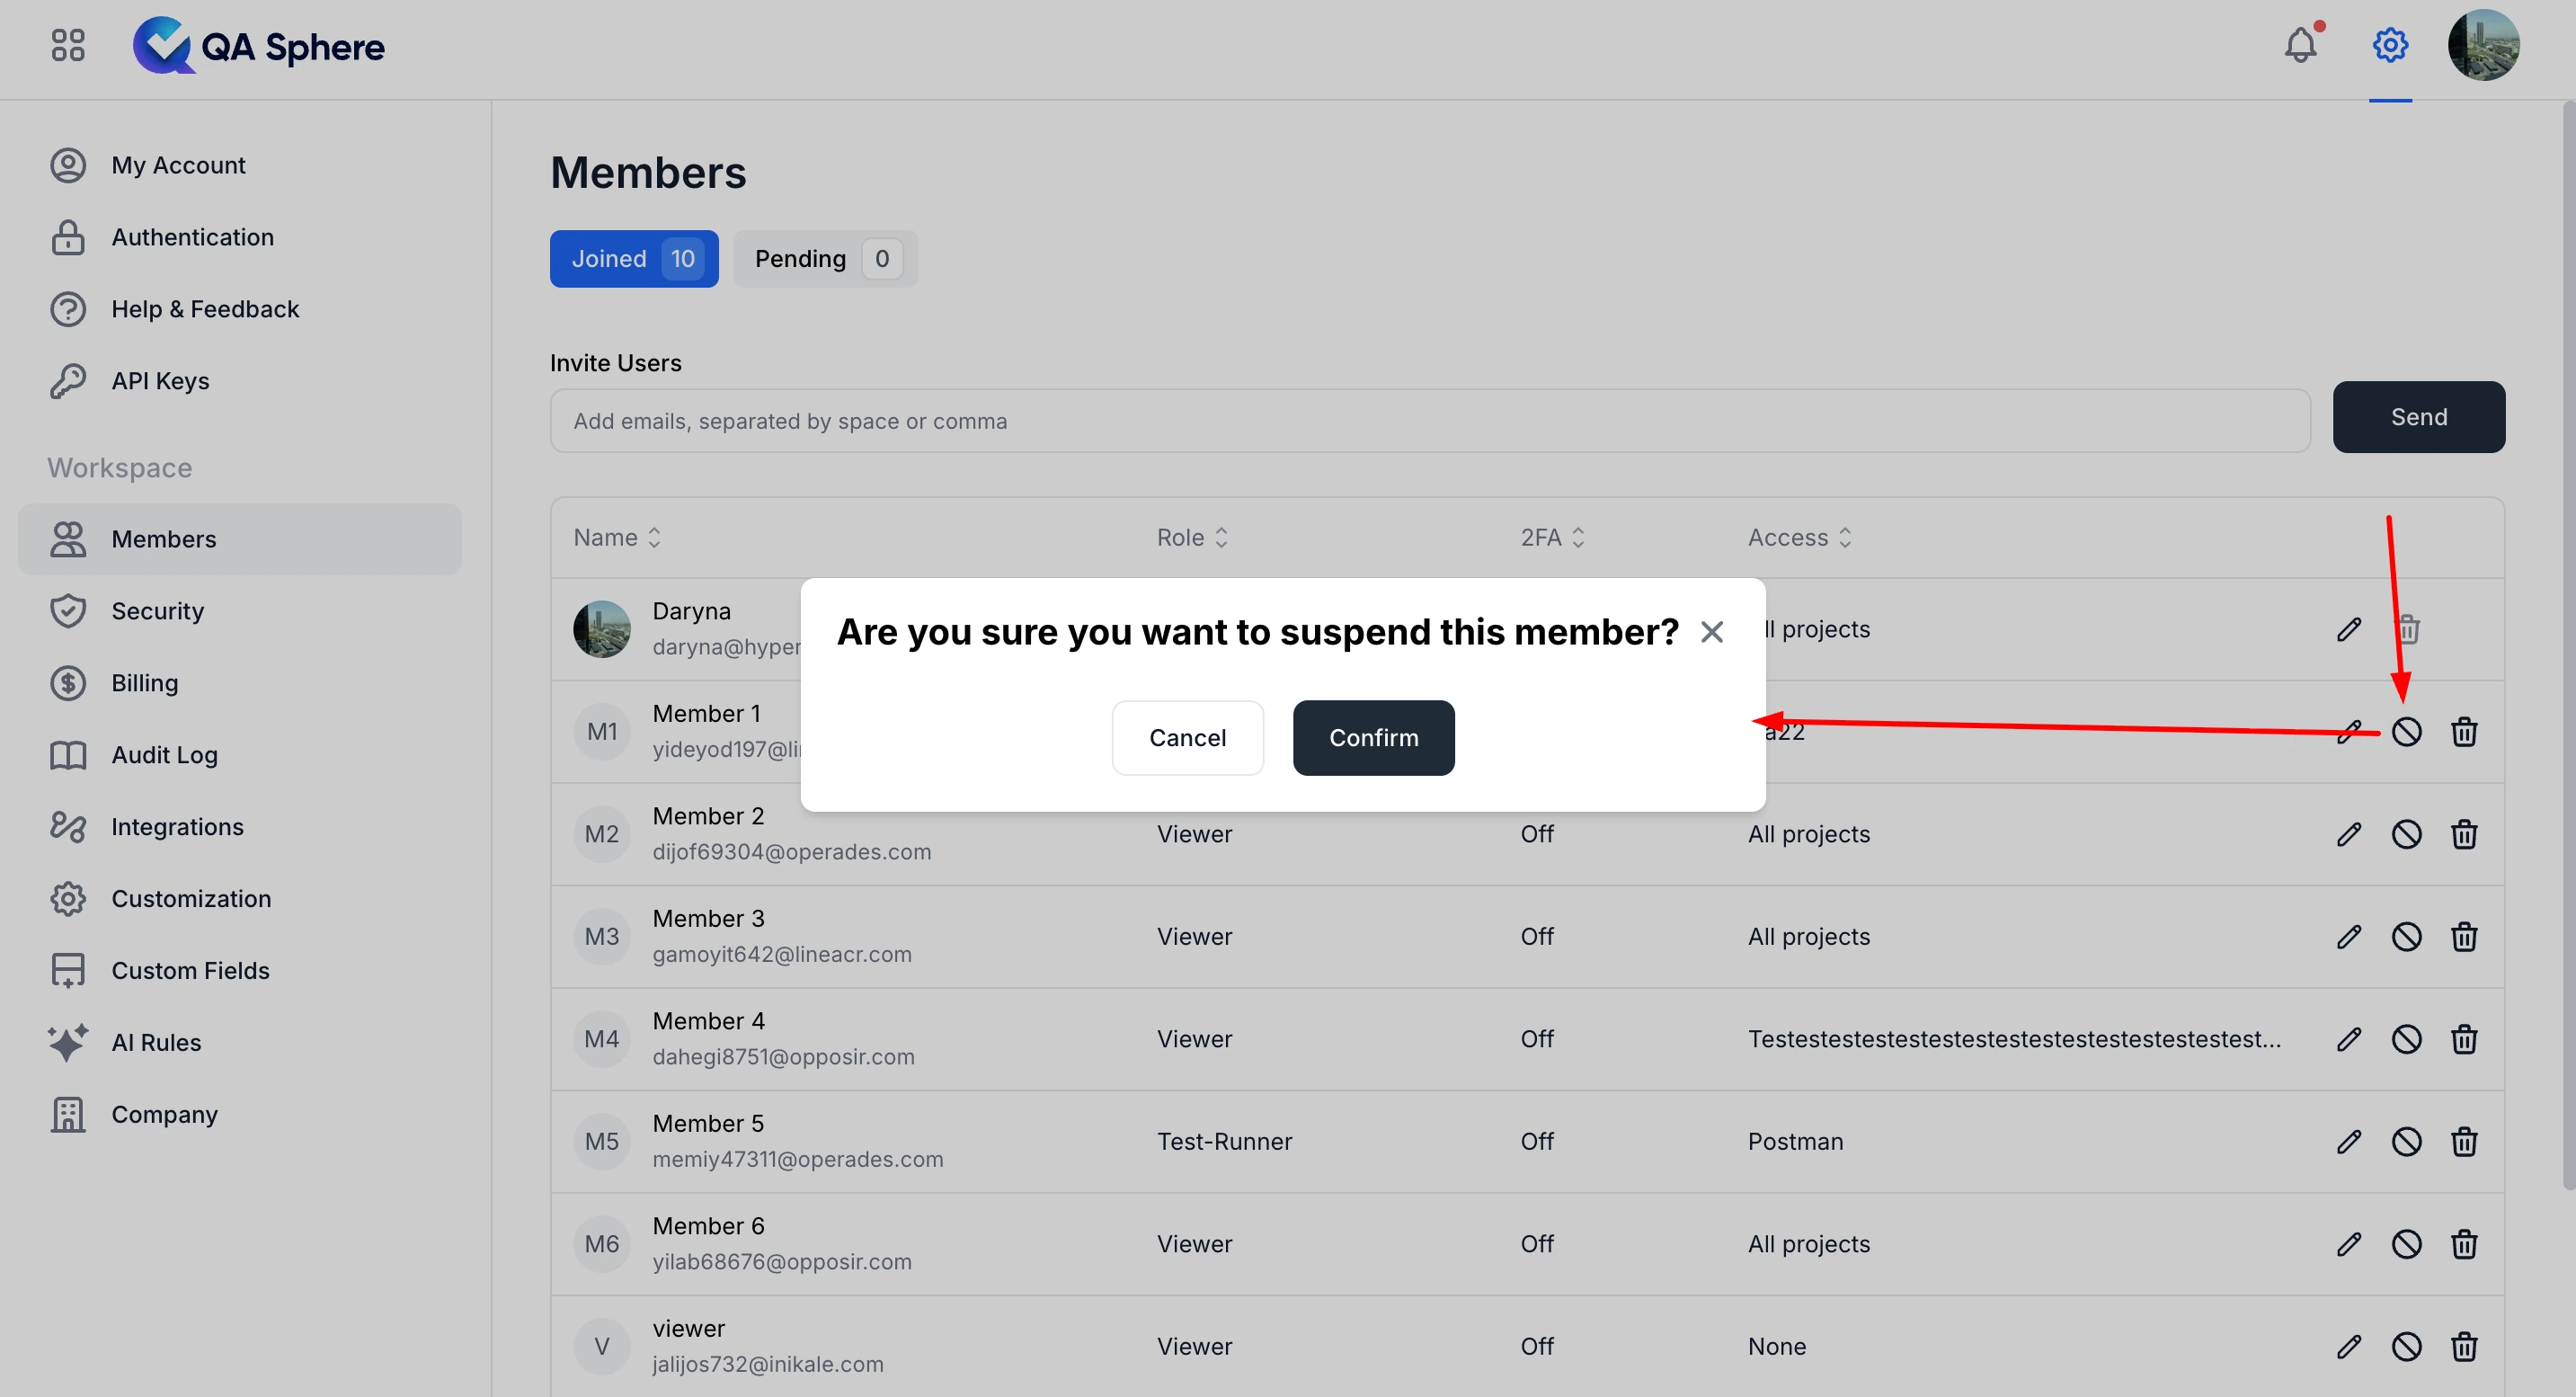
Suspend rather than delete when a team member is on extended leave, when an account may be compromised, or when you want to free a seat without losing attribution.
API keys owned by a suspended user stop working and return 403. If one of that user's keys is used by a CI pipeline or an integration, reissue it under a different account before suspending them.
On the Business plan, SCIM 2.0 can drive this automatically from your identity provider: unassigning a user in the IdP suspends them in QA Sphere, and reassigning them restores access.
Authentication and Workspace Security
Roles control what a user can do once they are in. How they get in, and who is allowed to try, is configured separately:
- Security — sign-in methods, two-factor authentication and its enforcement, IP allow lists, and the audit log
- SAML SSO — sign in through your identity provider (Business plan and above)
- SCIM provisioning — automate the user lifecycle from your IdP (Business plan and above)
Conclusion
Understanding and properly utilizing QA Sphere's role-based access control is key to maintaining a secure and efficient QA environment. By carefully assigning roles and permissions, you can ensure that each team member has the access they need while maintaining the integrity and security of your QA processes.
Remember, the goal is to balance accessibility with security. Regularly review and adjust your user permissions to adapt to your team's changing needs and to maintain optimal workflow in your QA processes.