

Jira Integration
Creating Jira Issues from QA Sphere
QA Sphere seamlessly integrates with Atlassian Jira, allowing you to create Jira issues directly while going through test cases in a test run. This integration streamlines your workflow and ensures efficient issue tracking within your Jira projects.
Configuring Jira Issues Integration
To integrate Jira Issues into QA Sphere, follow these steps:
- Go to Settings by clicking the gear icon
 in the top right corner and choose Workspace Settings.
 - Select Issue Trackers from the left sidebar.
- A list of all available projects will be displayed. Click the + button next to the appropriate project to add integration.
- Choose Jira from the list of available integrations.
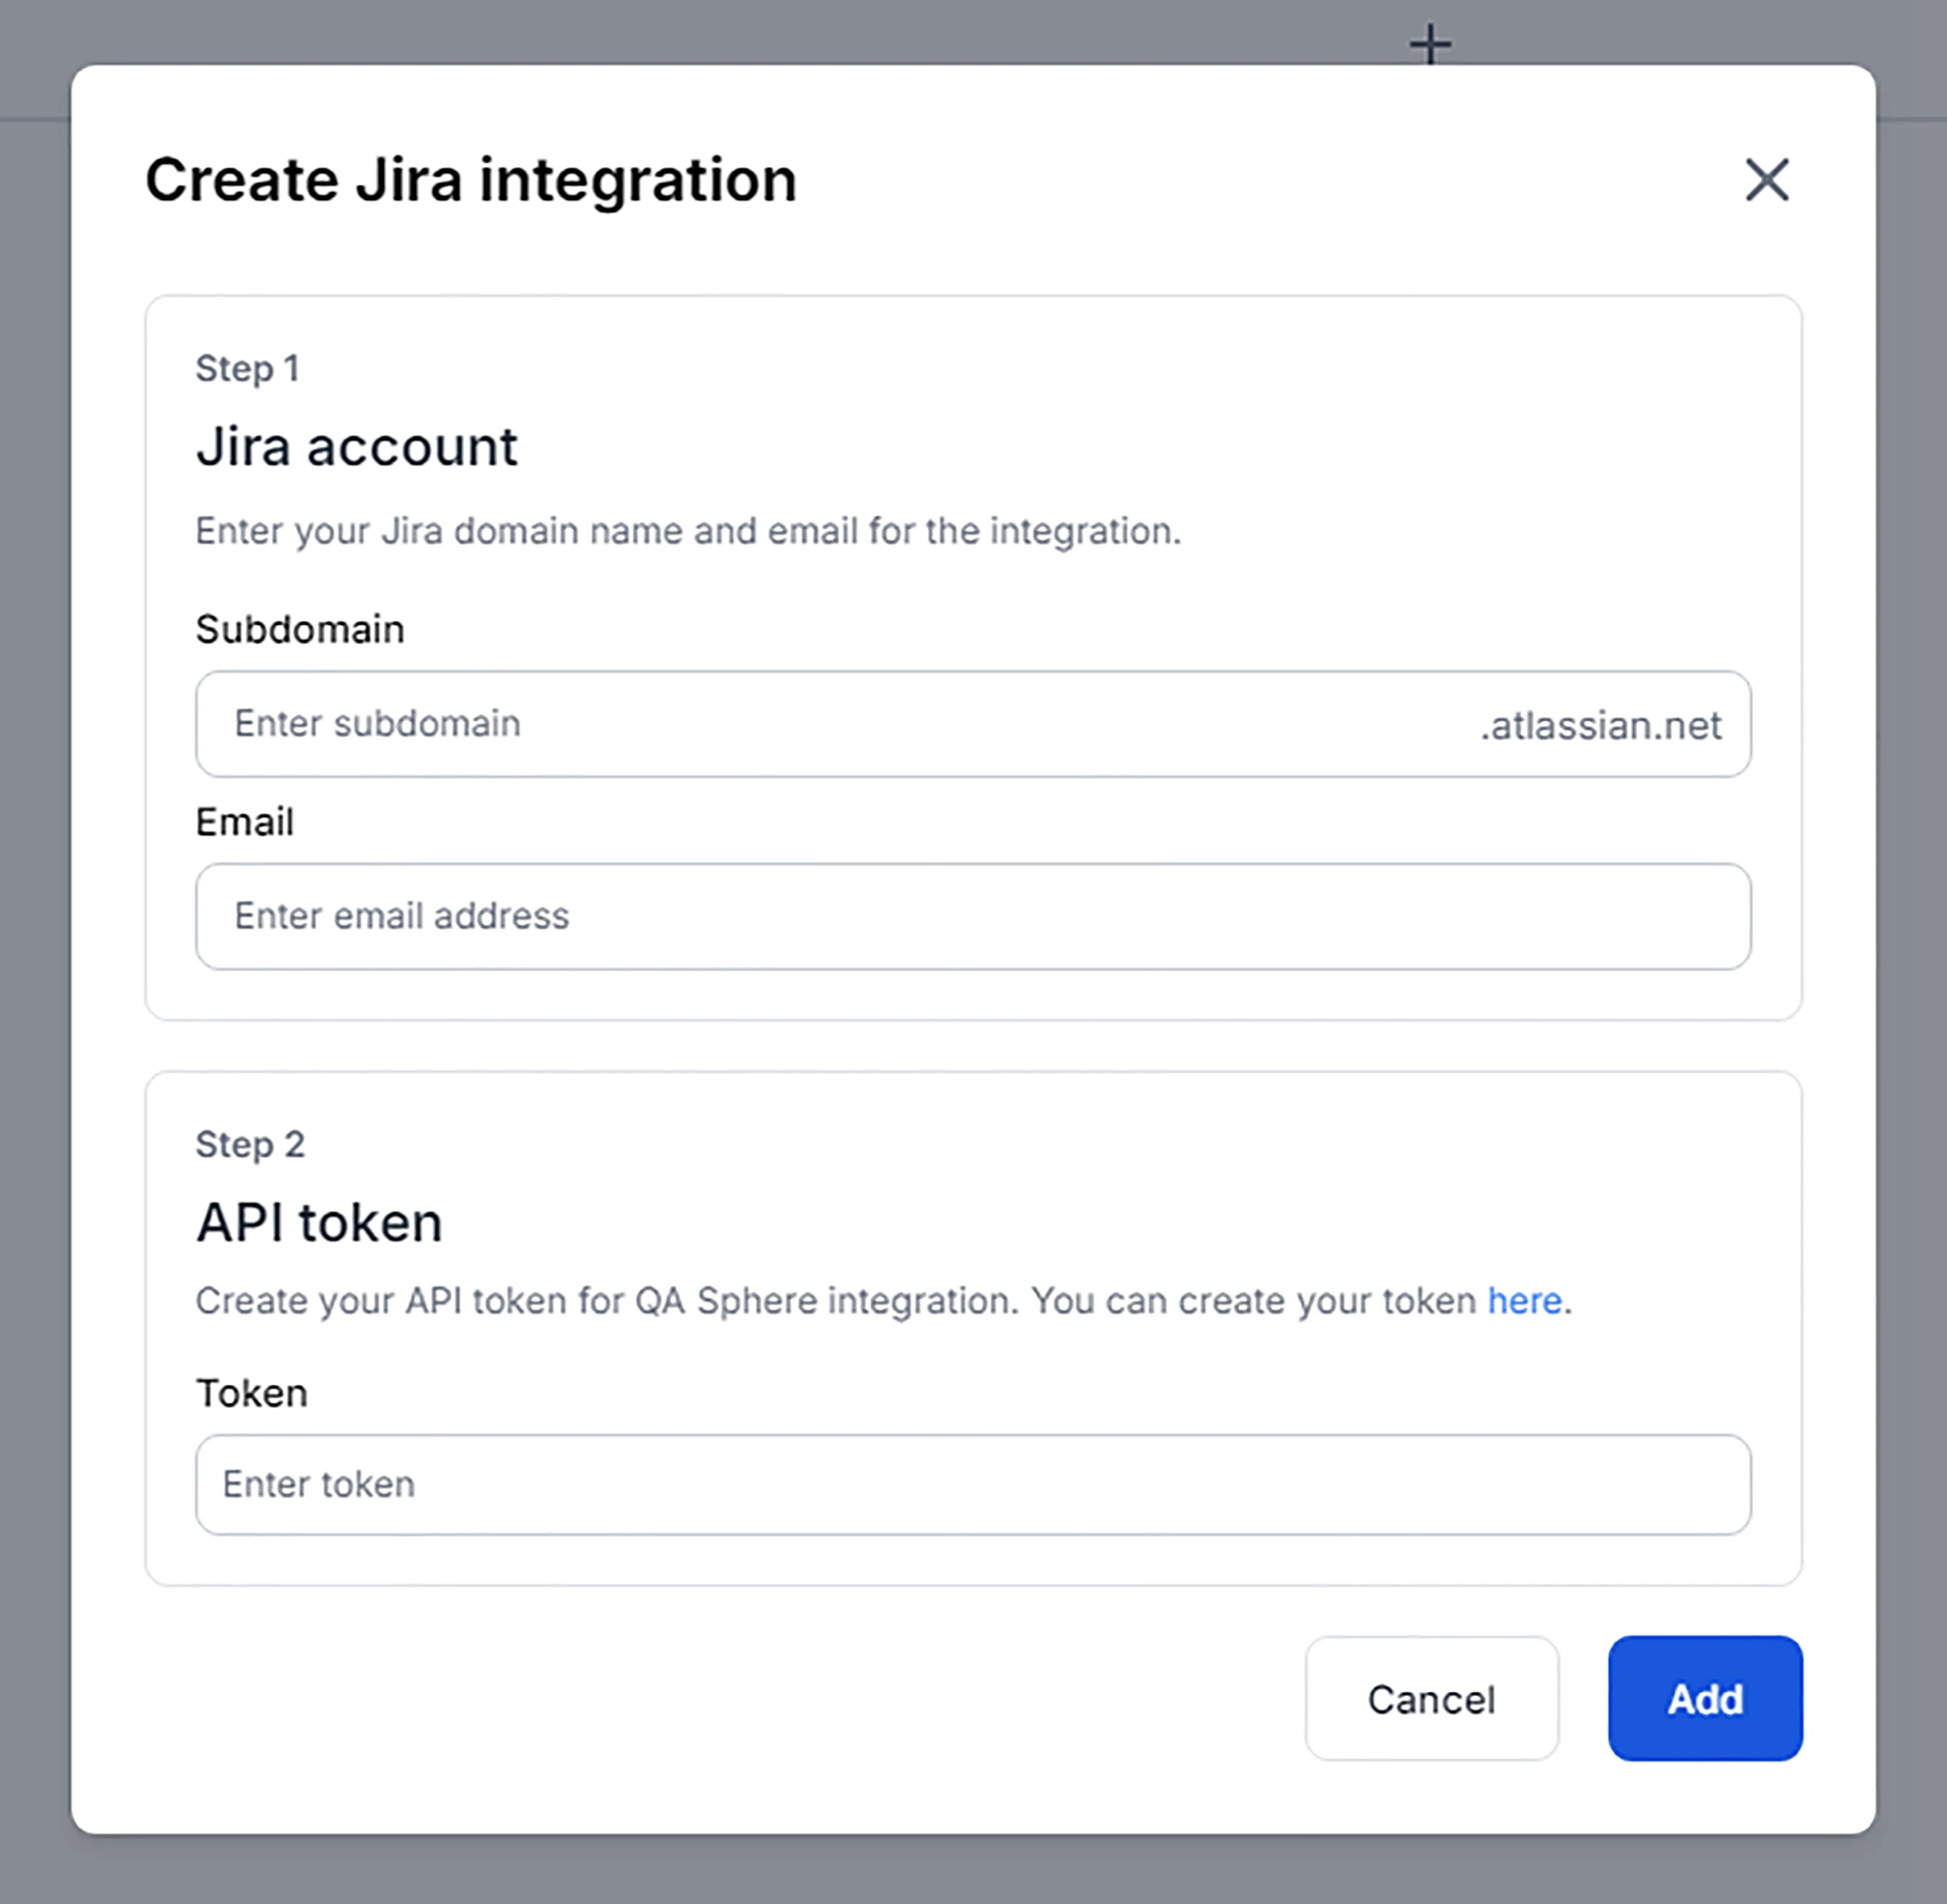
- Next provide your Jira account subdomain and the email used for registration.
- Navigate to https://id.atlassian.com/manage-profile/security/api-tokens to generate API token
- Use new token in the form and click Add
- Choose a project for new issues to be created in.
Using a Jira Service Account
The credentials above belong to whichever Atlassian account generated the API token, which makes the integration dependent on that person. If they leave, or their token is revoked, the integration stops working for the whole project.
QA Sphere supports Jira service accounts for this reason. Configure the integration with a dedicated service account rather than a team member's personal account so that:
- The integration survives staff changes
- The token's permissions can be scoped to exactly the Jira projects QA Sphere should write to
- Issue creation is clearly attributable to the integration in Jira's own history
If the integration suddenly starts failing, an expired or suspended token is the usual cause. QA Sphere reports this explicitly in the integration's error message, so check Settings → Issue Trackers before digging further.
Linking Your Personal Jira Account
By default, issues created from QA Sphere are reported by the account that configured the integration. Individual users can instead link their own Jira account, so issues they create from QA Sphere show them as the reporter in Jira.

This is worth doing on any team where it matters who found a bug: Jira notifications, dashboards, and reporter-based filters all then reflect the actual tester instead of a shared integration account. Linking is per user and does not change the project-level integration.
Using Jira Issues Integration
Once configured, the Jira Integration allows you to link existing issues or create new ones directly from QA Sphere while adding test case results. To create or link a Jira issue during testing:
- Within your project, navigate to the Test Runs section.
- Select an existing test run or create a new one.
- Choose a test case within the run.
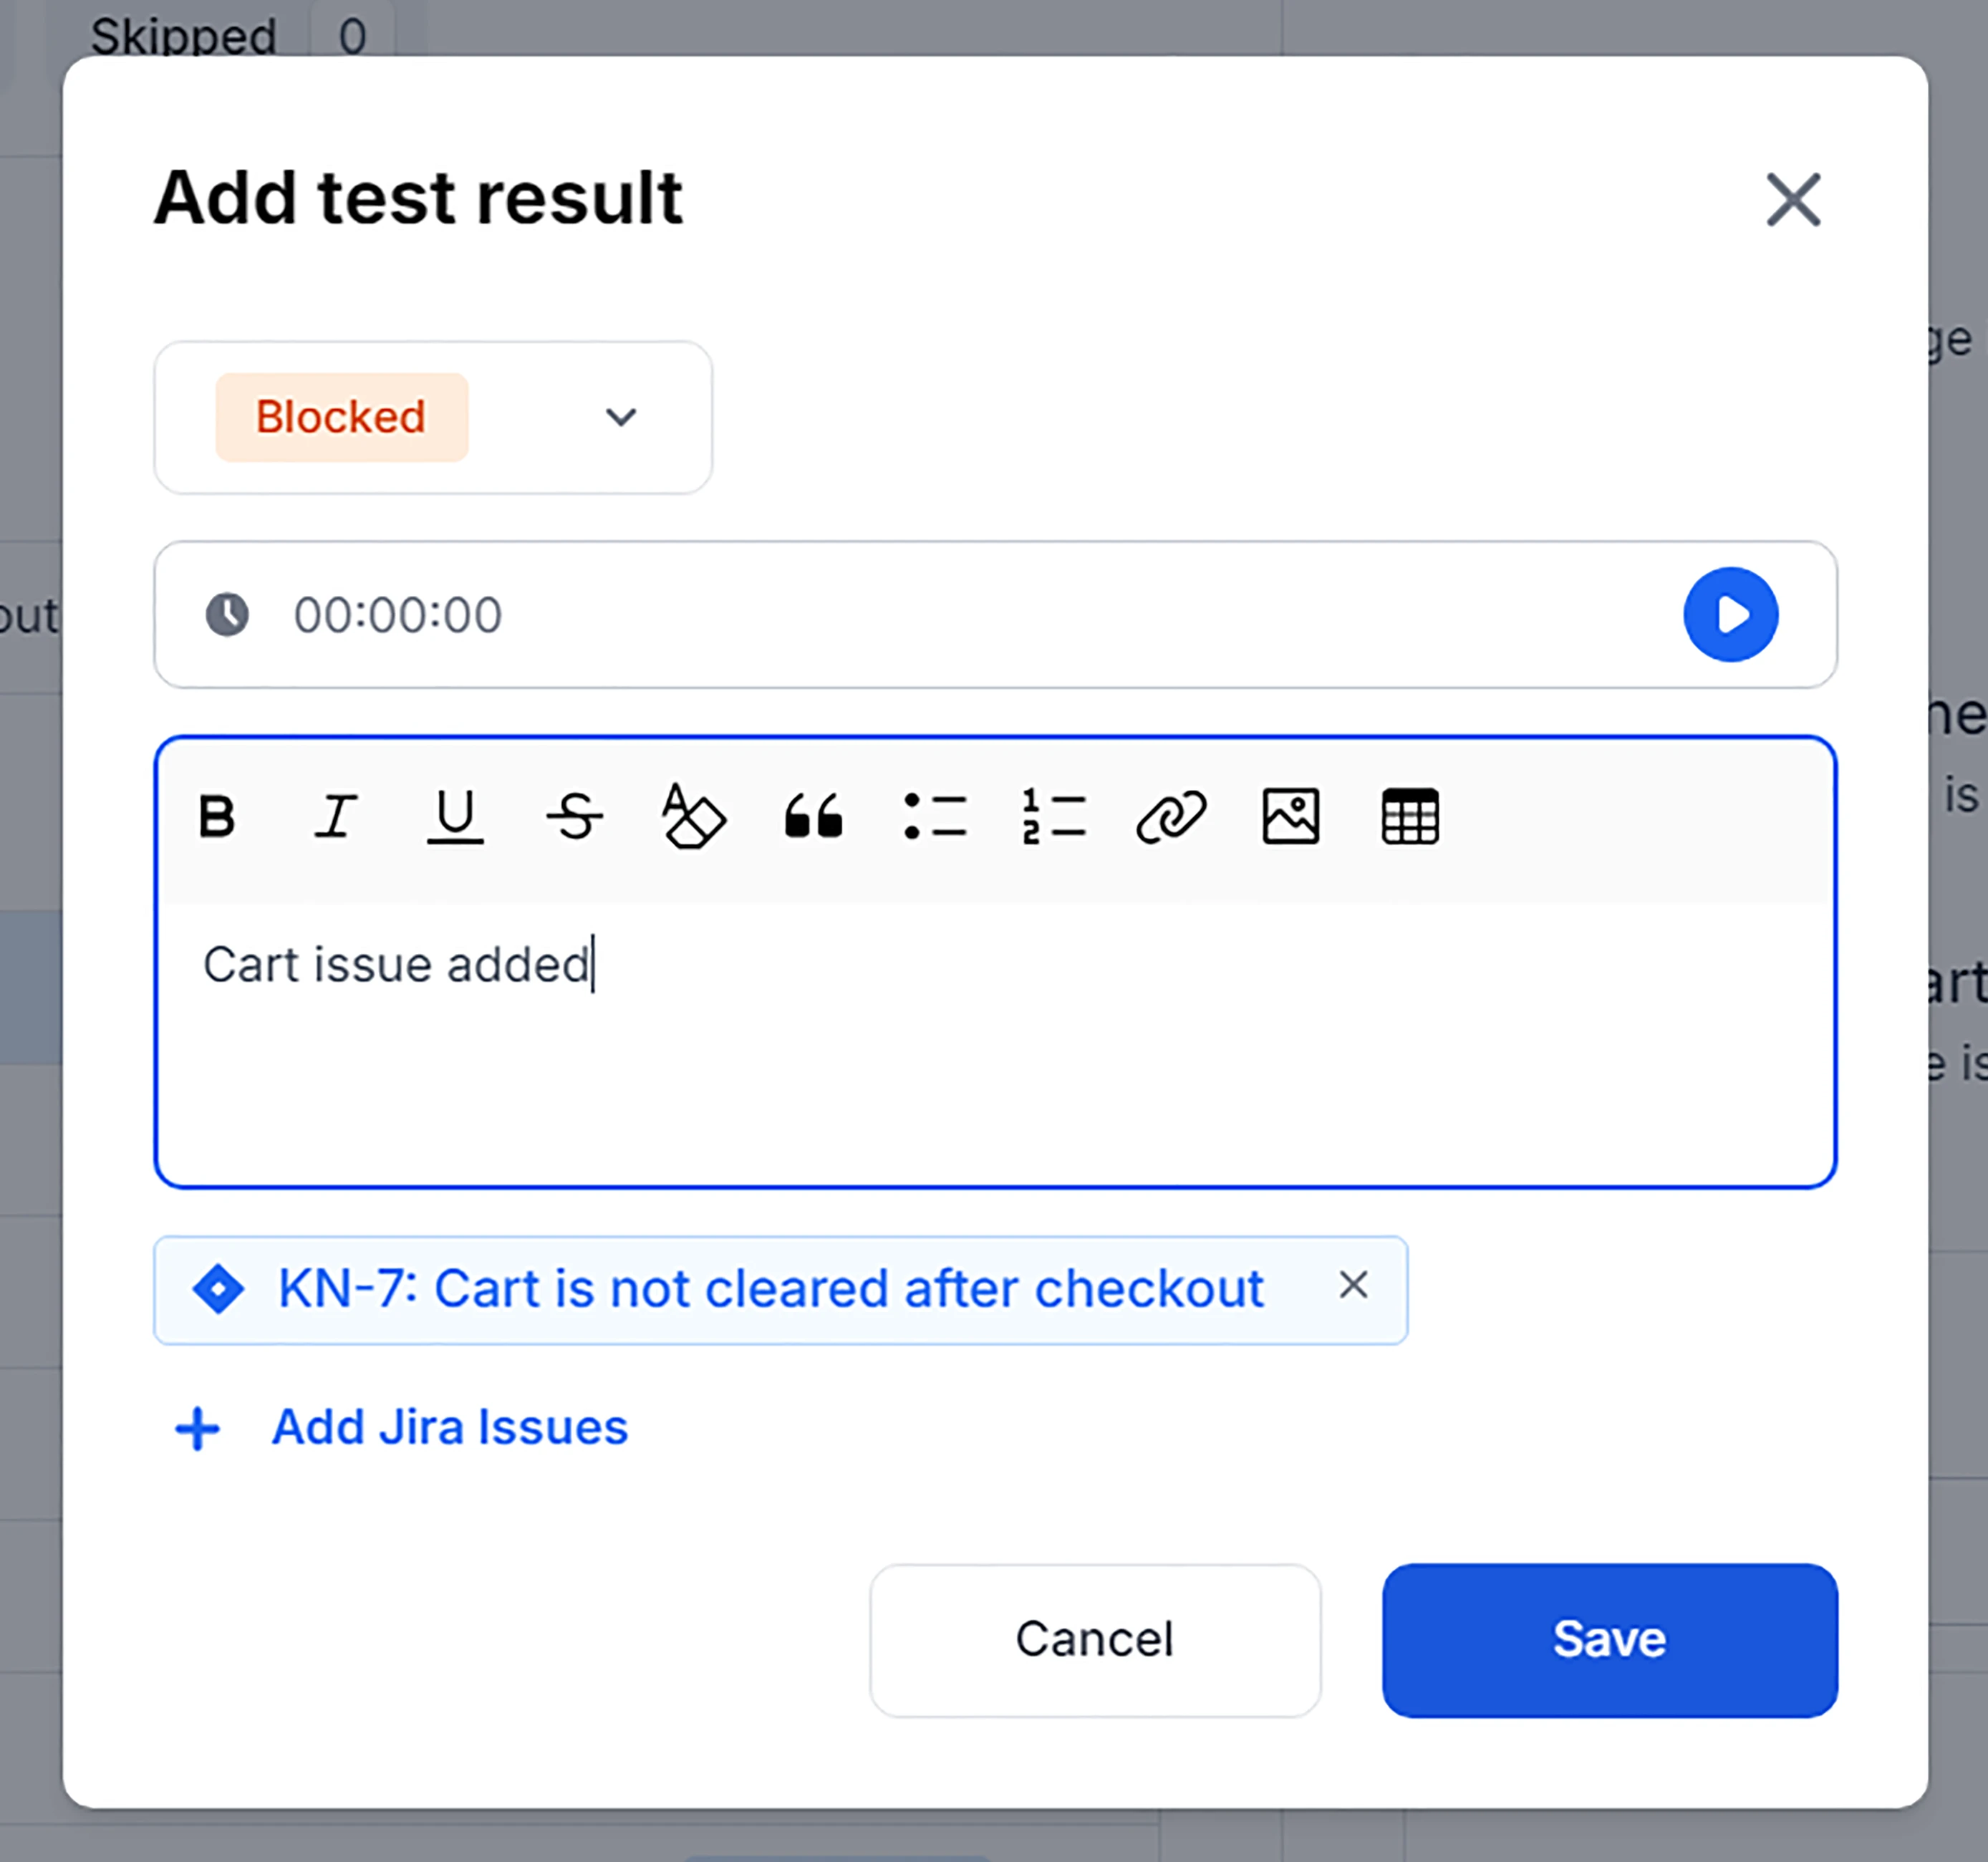
- When changing the status of the test case, click + Add Jira Issues and select one of the following options:
- Link existing issue - Add a link to an existing Jira issue.
- Create new - Enter details by selecting the Issue Type and either manually entering the Summary and Description or using AI to auto-generate the information based on test case details and result comments. A new Jira issue will be created in the assigned Jira project.
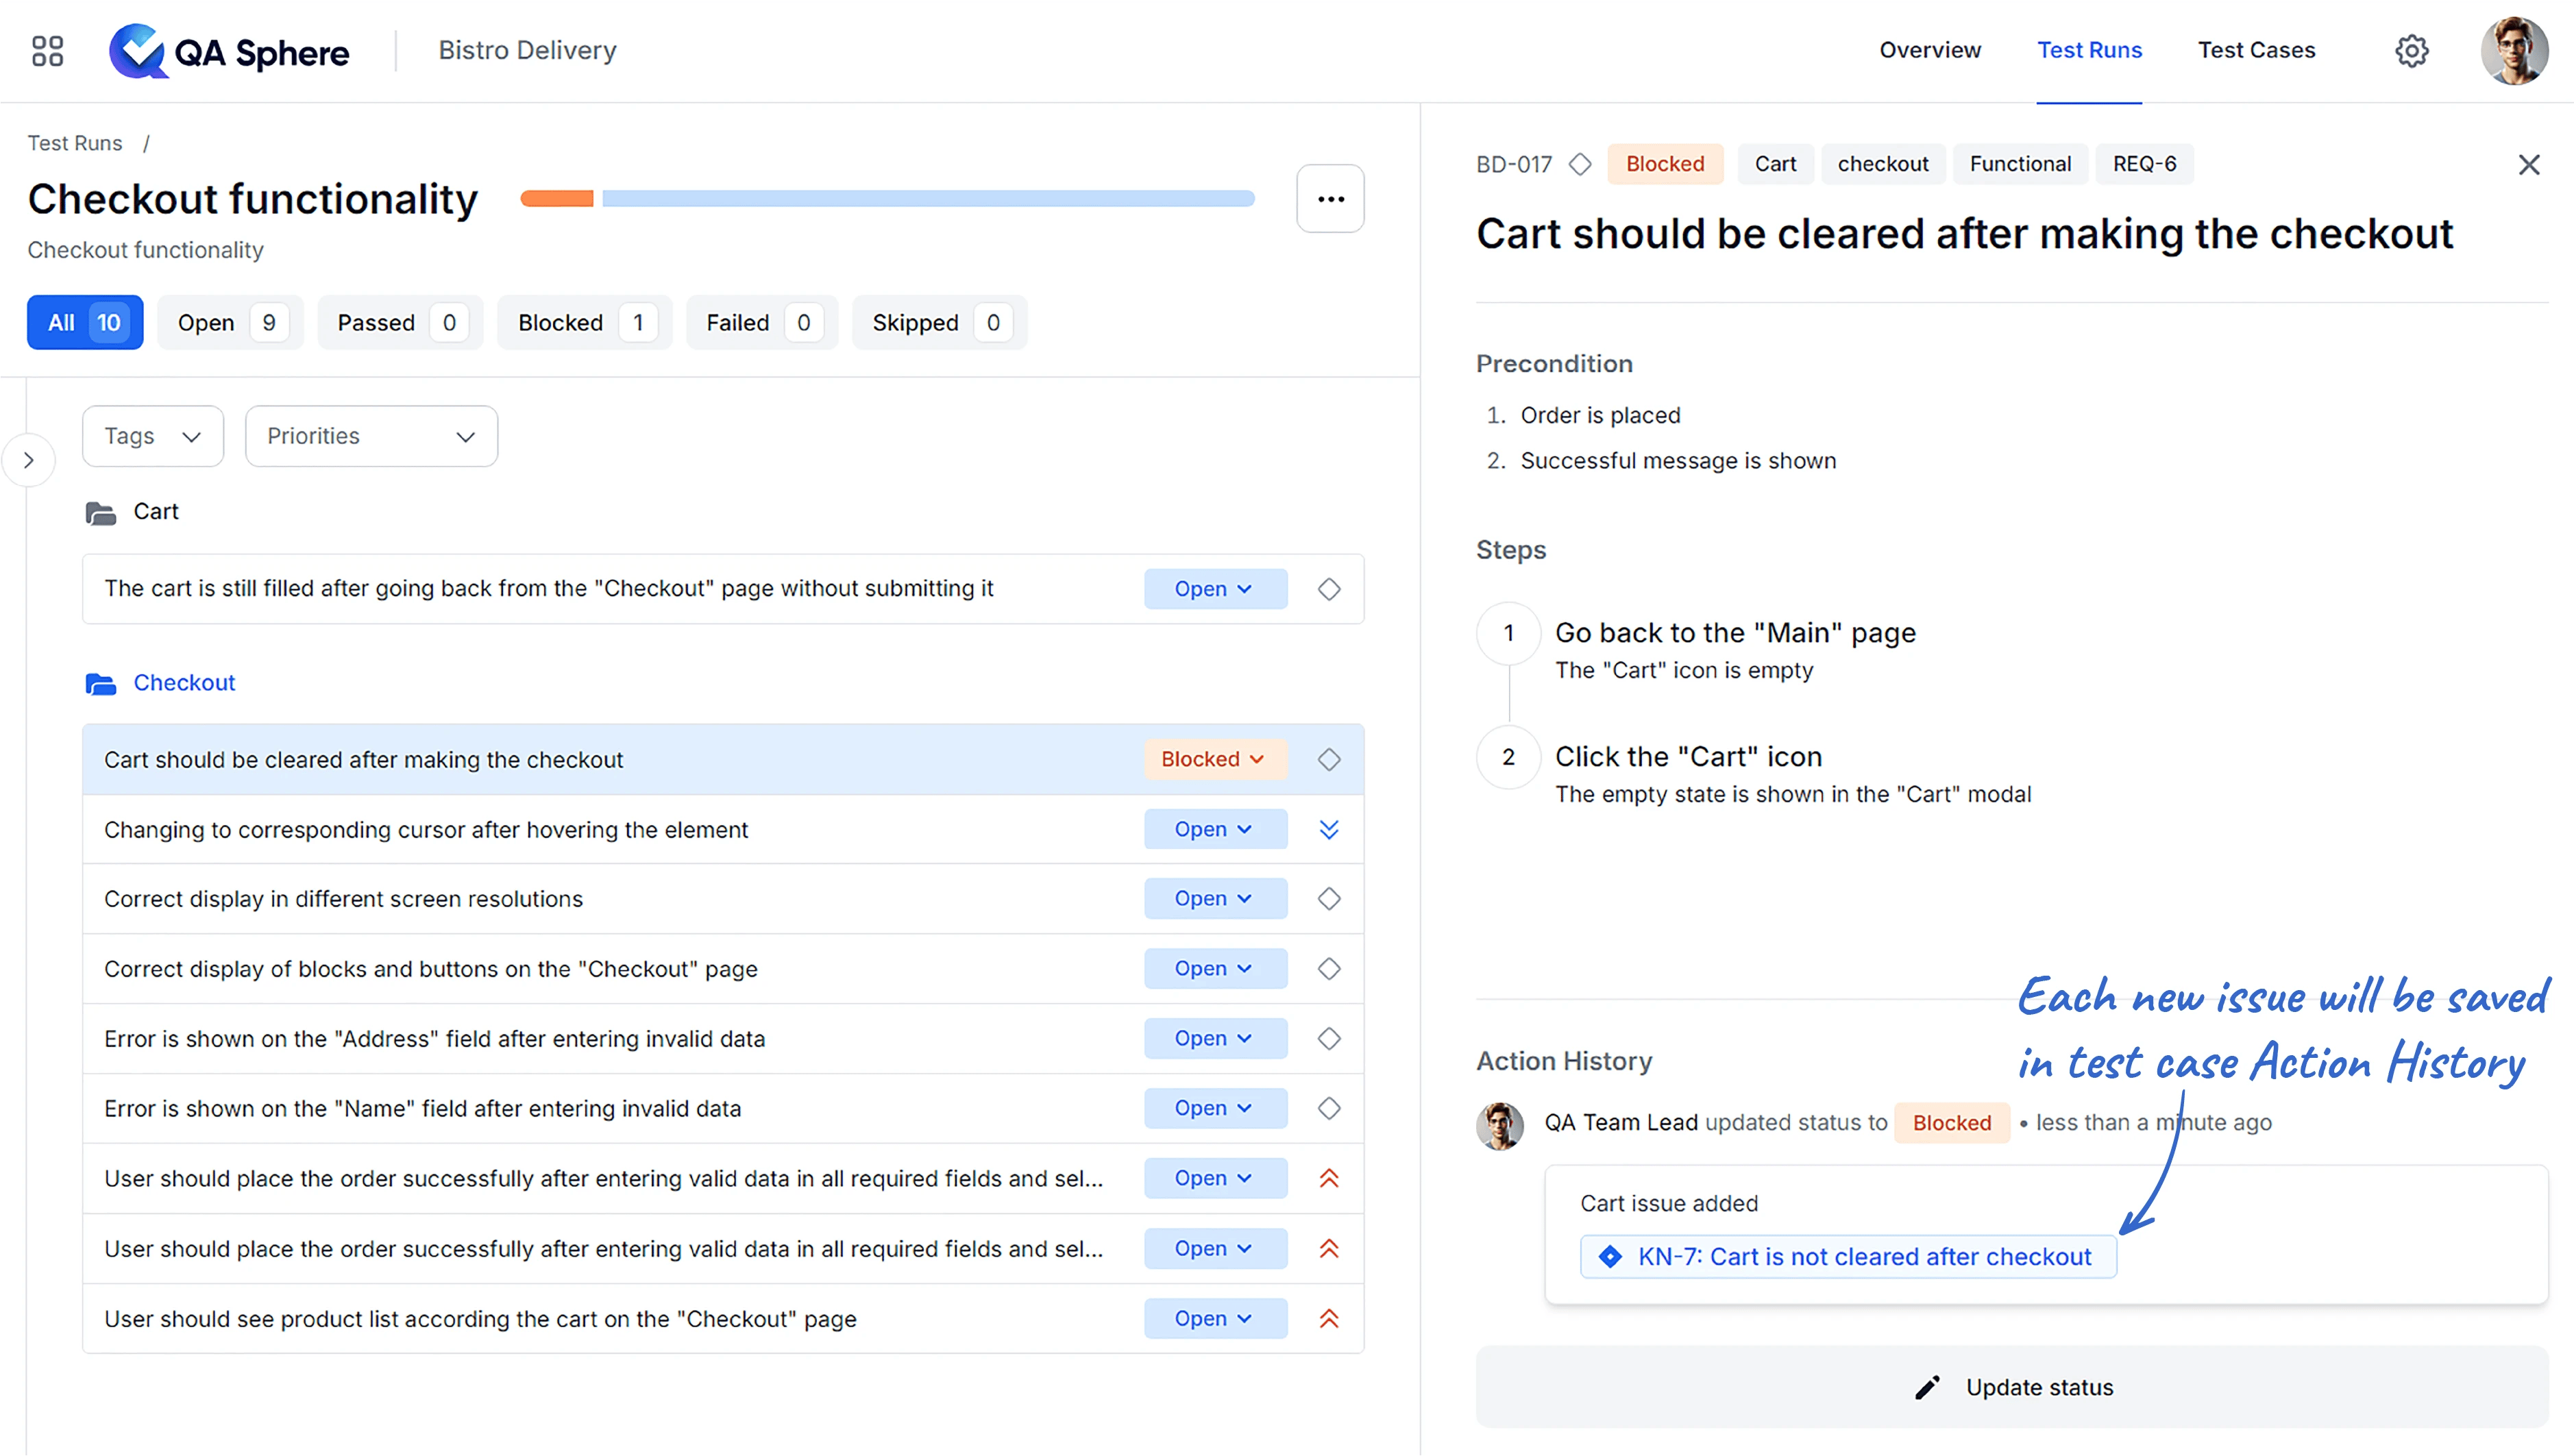
All issues linked or created for the test case will be saved under the Action History for this test run, providing a clear trail of documentation.
- AI issue generation may fail if there is insufficient context from the test case details and result comments to accurately determine the issue observed during testing.
- AI issue generation is not available when batch-adding results for multiple test cases simultaneously.
Finding an Existing Issue
When linking an existing issue, you can search by:
- The full Jira issue URL, pasted straight from your browser
- Part of the issue key, without typing it in full
Required Fields on Create
If your Jira project marks fields as required on the issue-creation screen, QA Sphere respects them: the required fields appear in the Create new form so the issue is accepted by Jira on the first attempt instead of failing and needing a manual fix.
The following required field types are supported:
- Text field and text area
- Select (single-option dropdown)
- Labels (autocomplete array)
- Multi-checkboxes (multi-select)
Required-field support is partial. A Jira project that requires a field type outside the list above — a cascading select or a custom field from a third-party Jira app, for example — may still reject the issue. If issue creation fails for a project like that, make the field optional in Jira or supply a default value in the Jira field configuration.
Importing Requirements from Jira
Beyond bug reporting, Jira issues can serve as requirements for traceability. In the Edit Requirements modal on a test case, use the Import from Jira option to pick the issues that the test case validates. Imported requirements appear in the Traceability Report with their issue keys, linking coverage analysis back to the tracker where your requirements already live.
Benefits of Jira Integration
- Seamless Workflow: Create issues in Jira without leaving QA Sphere.
- Consistency: Ensure all issues are properly documented and tracked in your Jira project.
- Traceability: Easily link test cases to specific Jira issues for better tracking.
- Efficiency: Reduce time spent switching between QA Sphere and Jira.
- Team Collaboration: Improve communication between QA and development teams by centralizing issue reporting.
By leveraging this integration, your team can maintain a more cohesive and efficient testing and issue management process across QA Sphere and Jira.