

Quick Start
Dive in into managing your tests
This guide will help you get started with creating projects, adding test cases, and running tests.
Creating a Project
A project in QA Sphere can be used for assigning test cases to a specific app or a certain functional part of a bigger application.
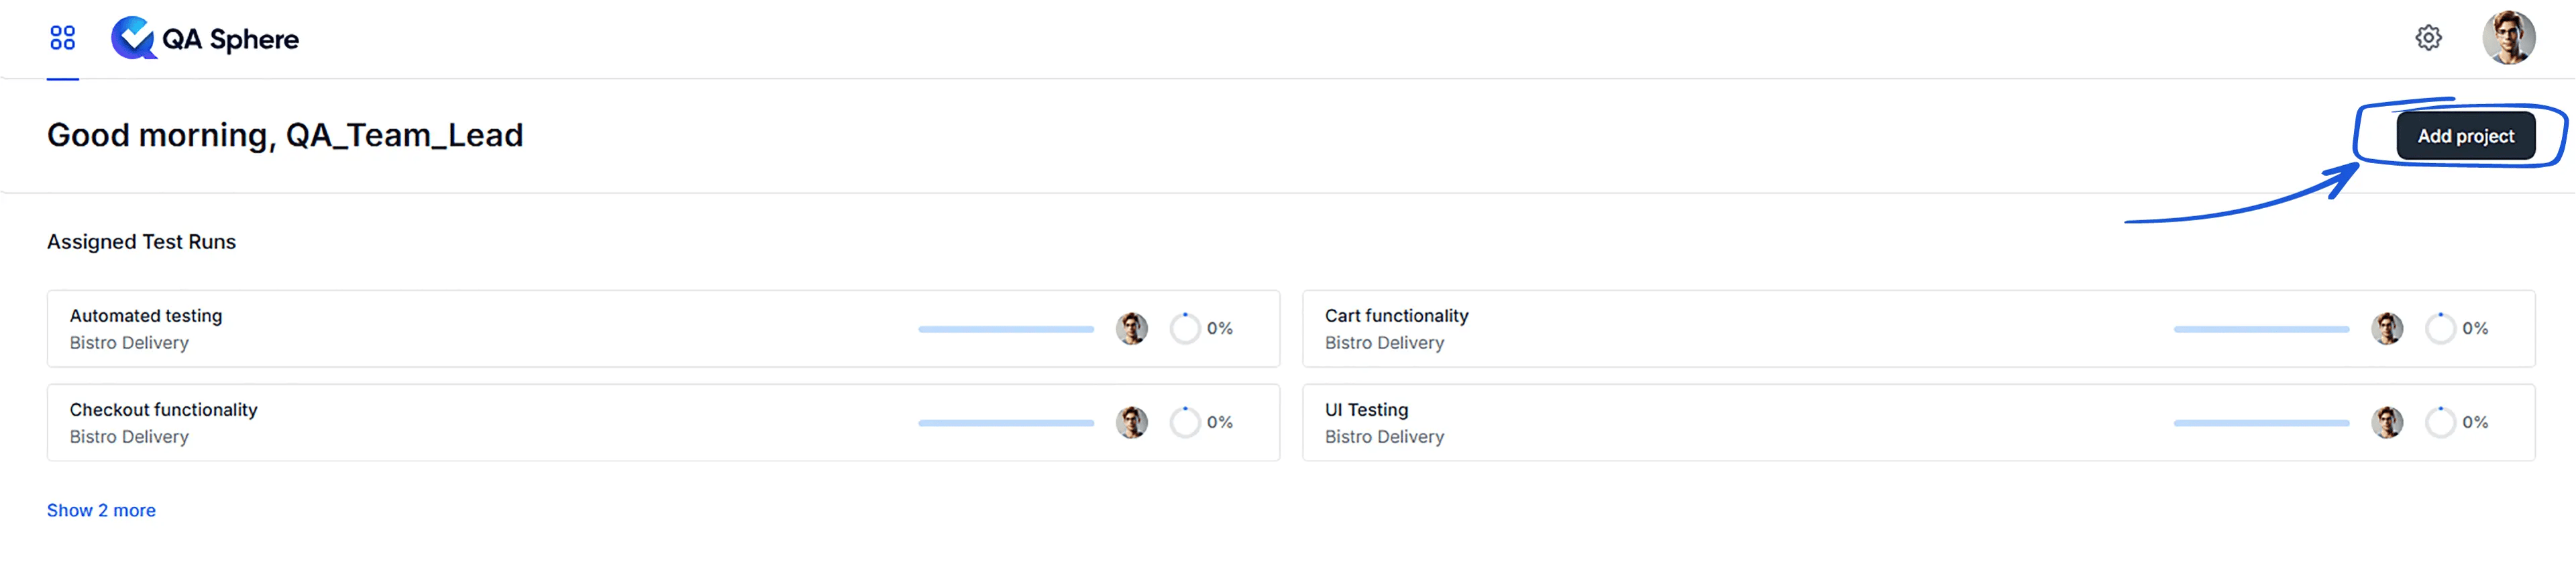
- Navigate to the top-right corner of the screen.
- Click on the Add Project button.
- Follow the prompts to set up your new project.
Adding Test Cases
Well-described and structured test cases are the basic requirement for running tests.
- Switch to the Test Cases tab in your project.
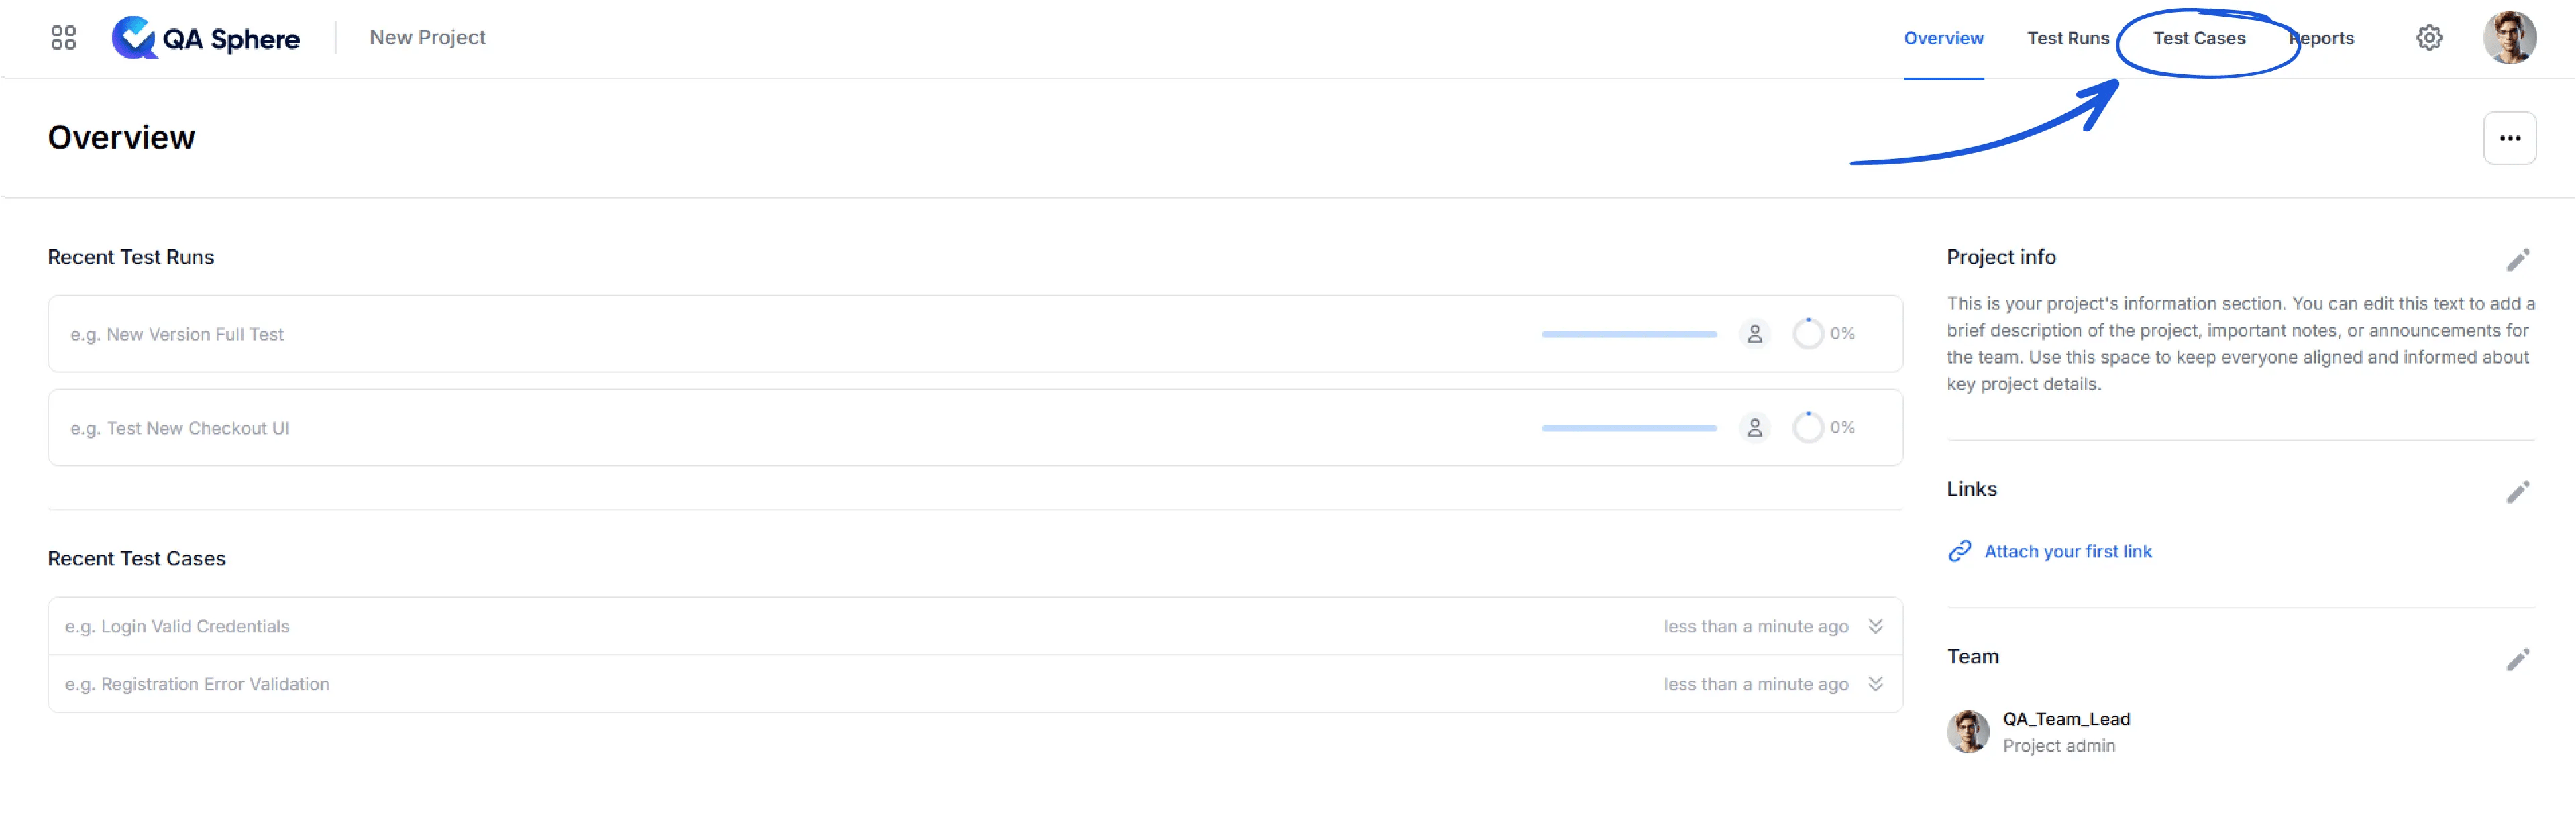
- Add test cases using one of three methods:
- Type directly into the list
- Use the Create Test Case form for more detailed entries
- Generate a batch with Create → Bulk Test Cases with AI, from a prompt or an attached spec — see AI Features
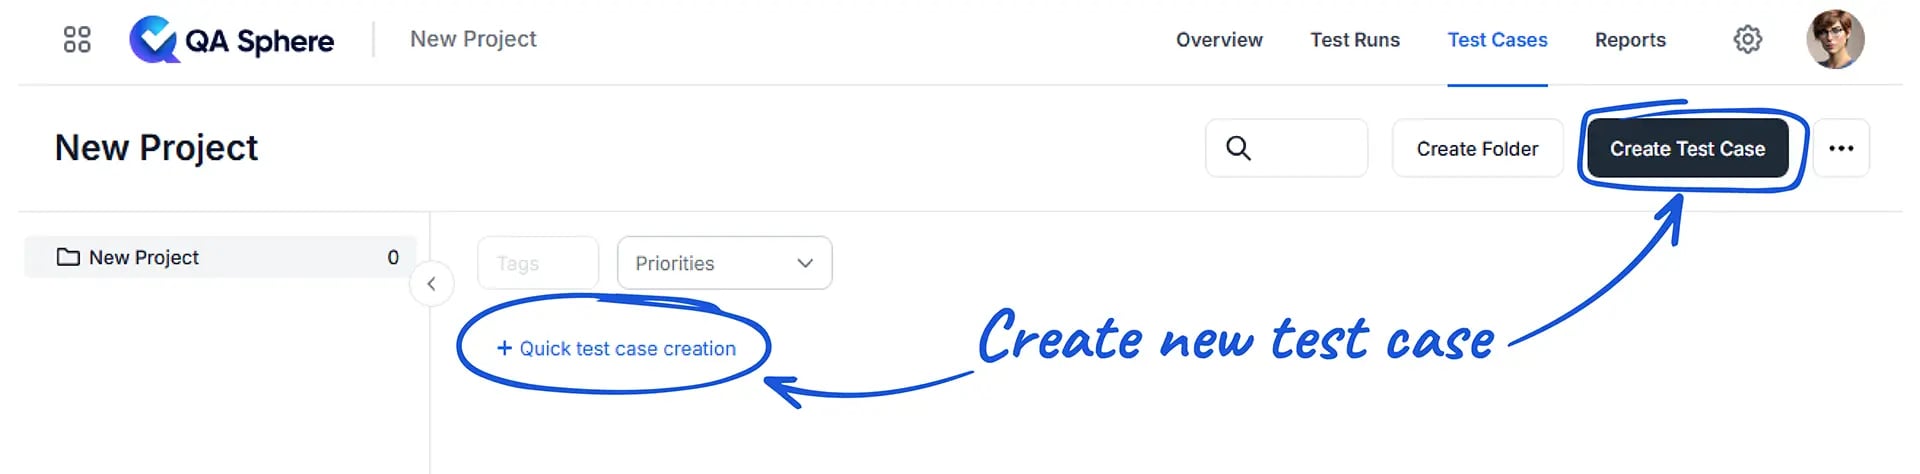
- Create folders using Create Folder button and organize your test cases for better structure
Using the Create Test Case Form
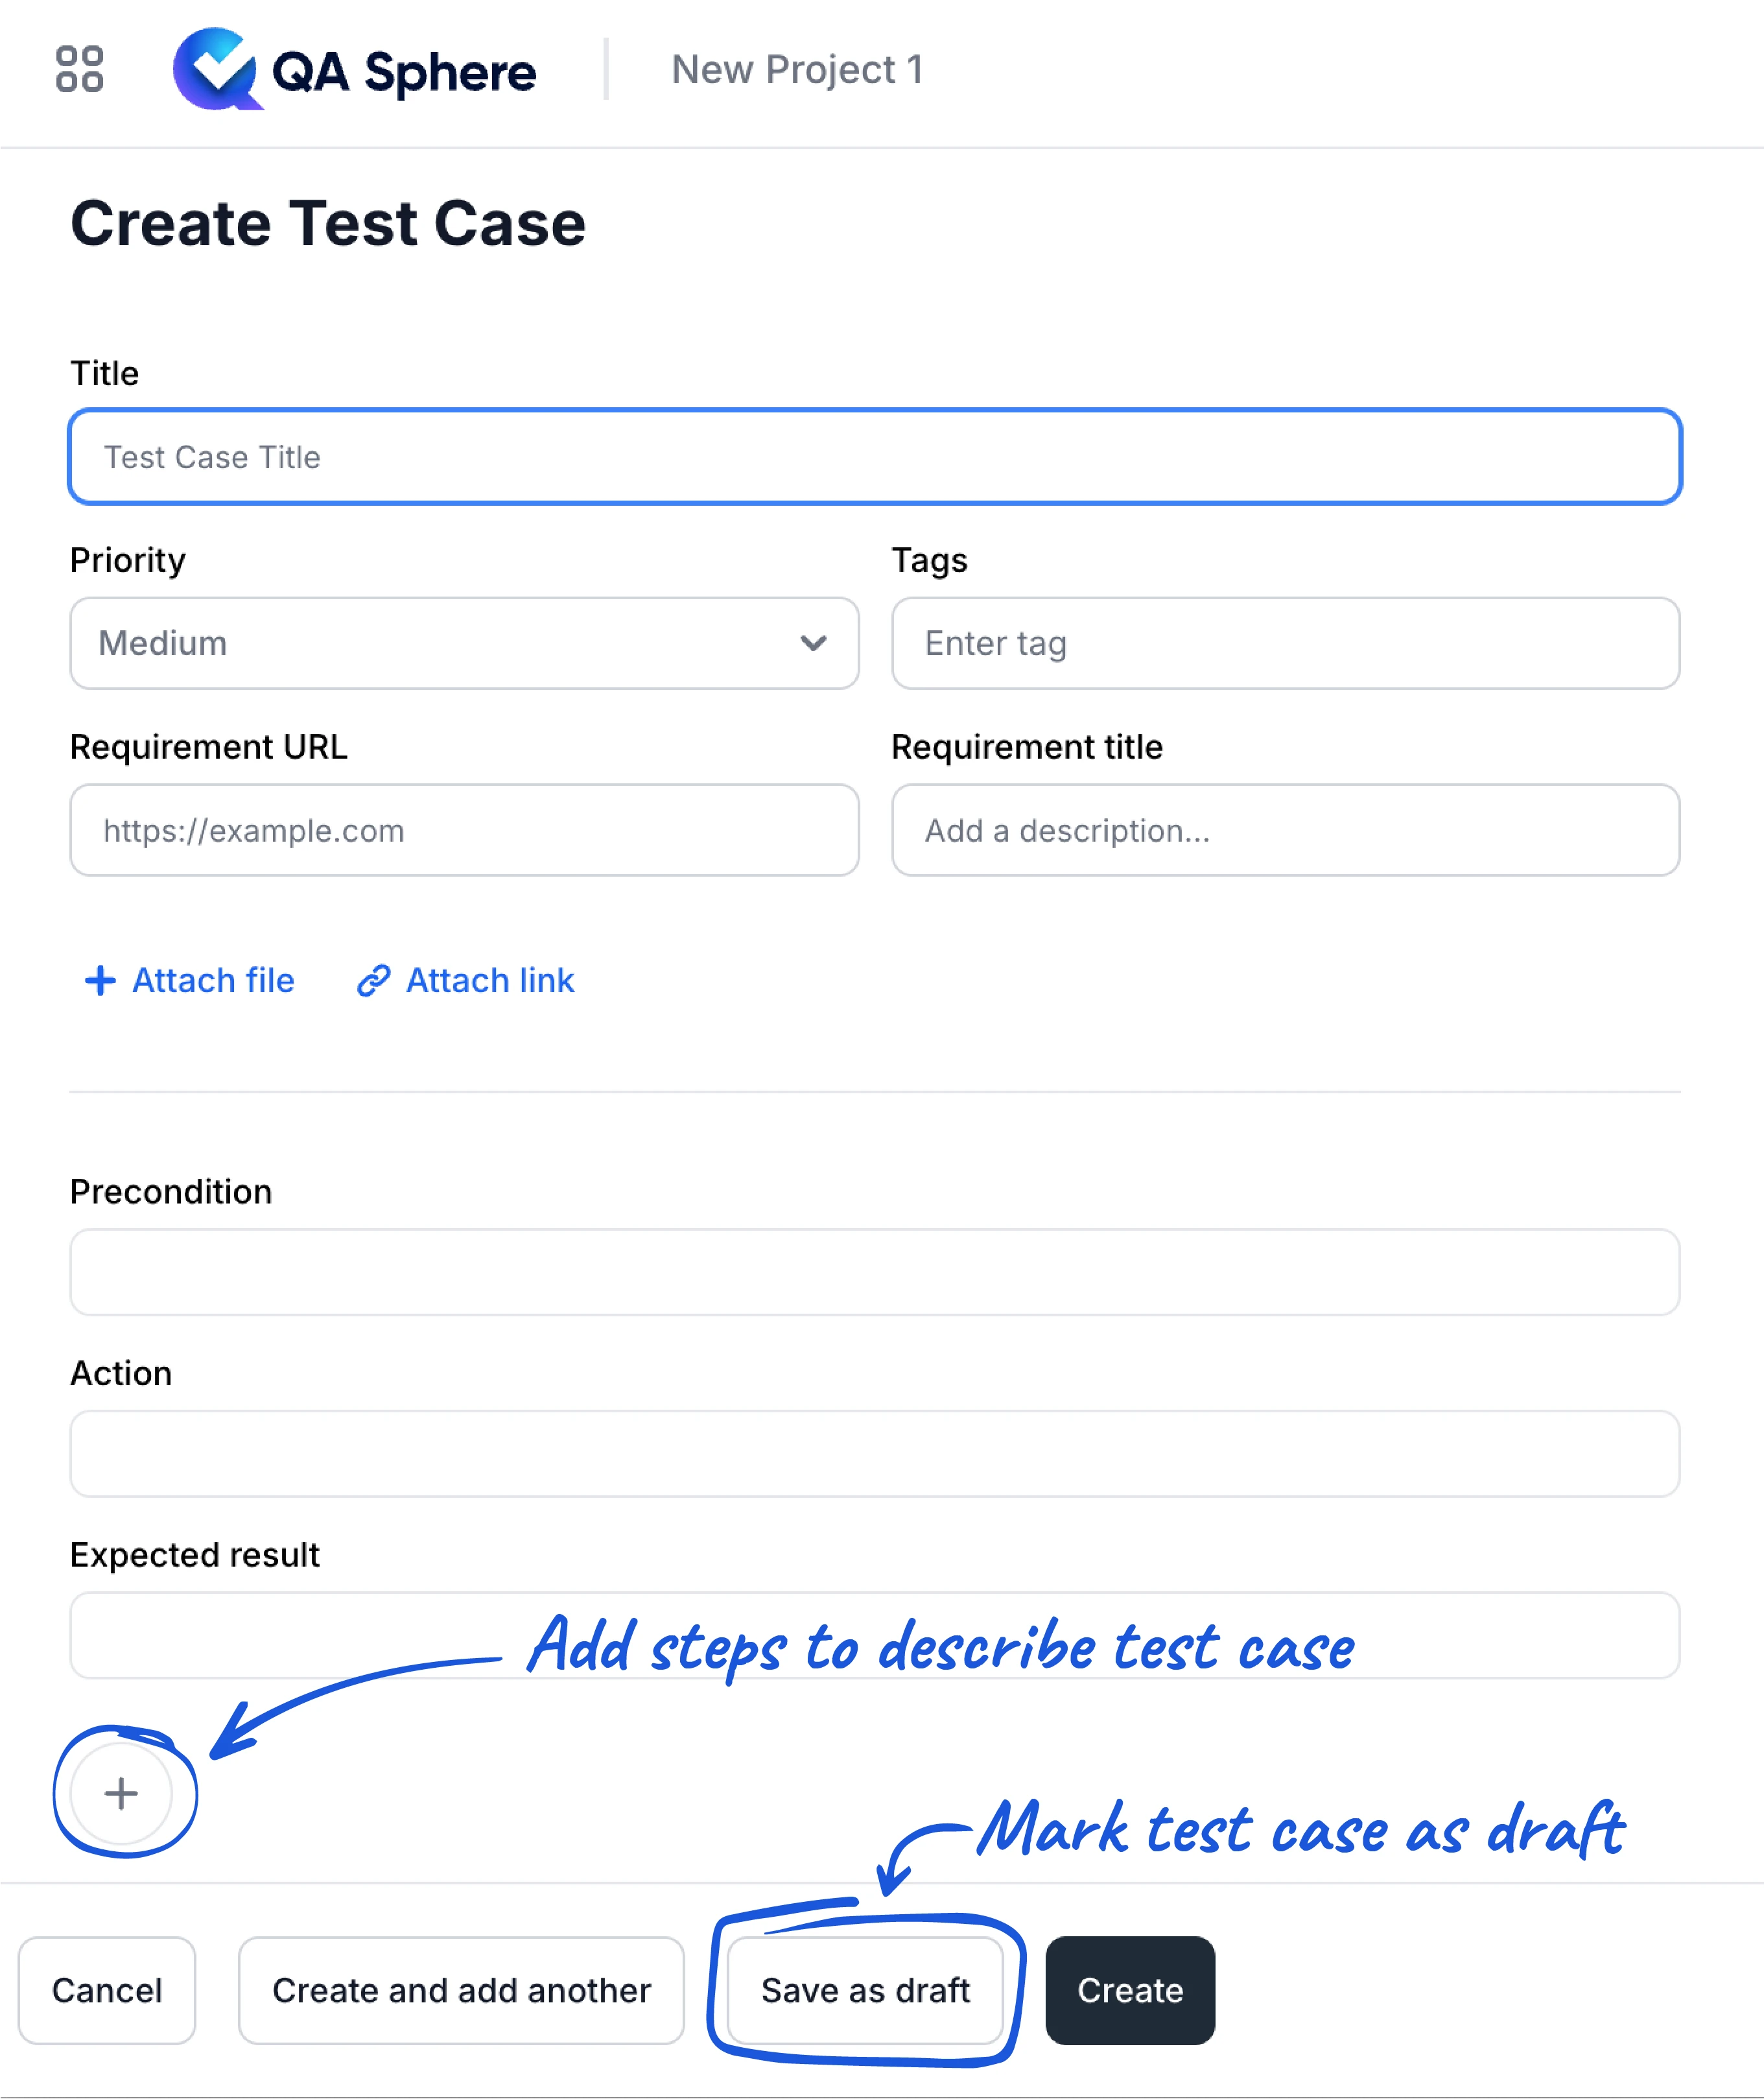
The form allows you to specify:
- Detailed description
- Preconditions
- Steps to take, each with an expected result and optional test data
- Requirements
- Priority
- Tags
- Custom fields defined for the project
- Additional resources (attachments)
Test Data on Steps
A step can carry its own test data alongside its description and expected result: credentials, request payloads, sample values, links, and file attachments. This keeps the data next to the step that uses it instead of buried in the preconditions.
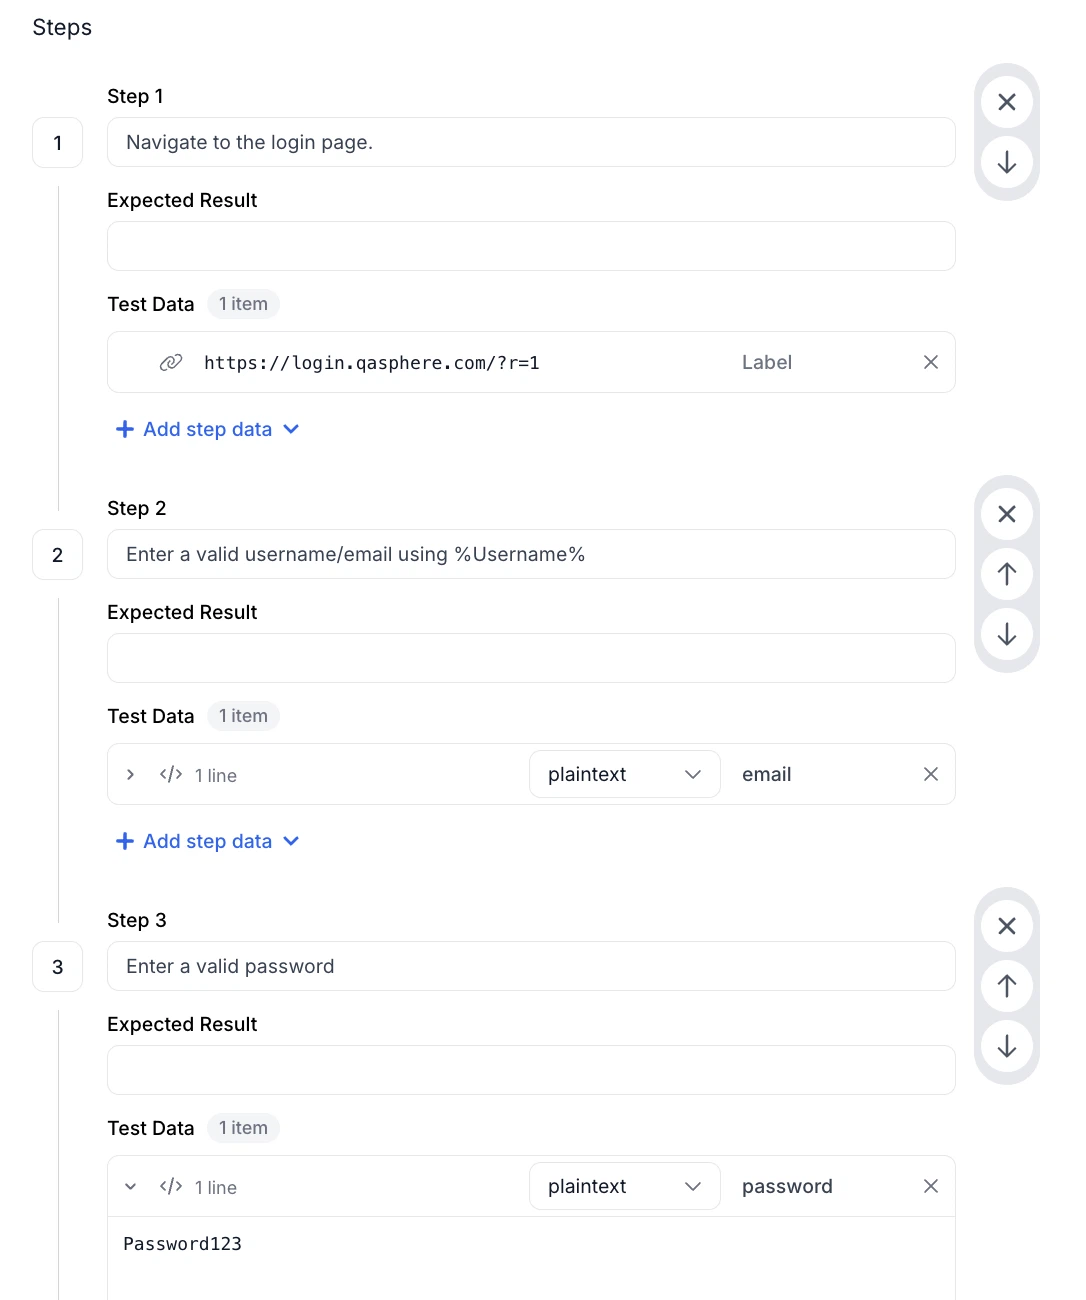
Each item is text (with an optional language hint for syntax highlighting), a link, or a file, and a step can hold up to 20 items. Text items can hold large payloads, so a full JSON request body is fine. The Data field can be turned on or off for the workspace in Settings.
Drafts and Publishing
A test case is either a draft or published. Drafts are work in progress: visible in the library, but not yet part of your stable suite. Publish a case when it is ready to be executed.
The transition works in both directions:
- Published cases can be reverted to draft, individually or in bulk, when they need rework. A case that is already linked to a test run cannot be reverted — remove it from the run first.
- While editing a published case, you can save your changes as a draft rather than publishing them immediately, so an in-progress rewrite does not disturb testers using the current version.
Creating Test Runs
-
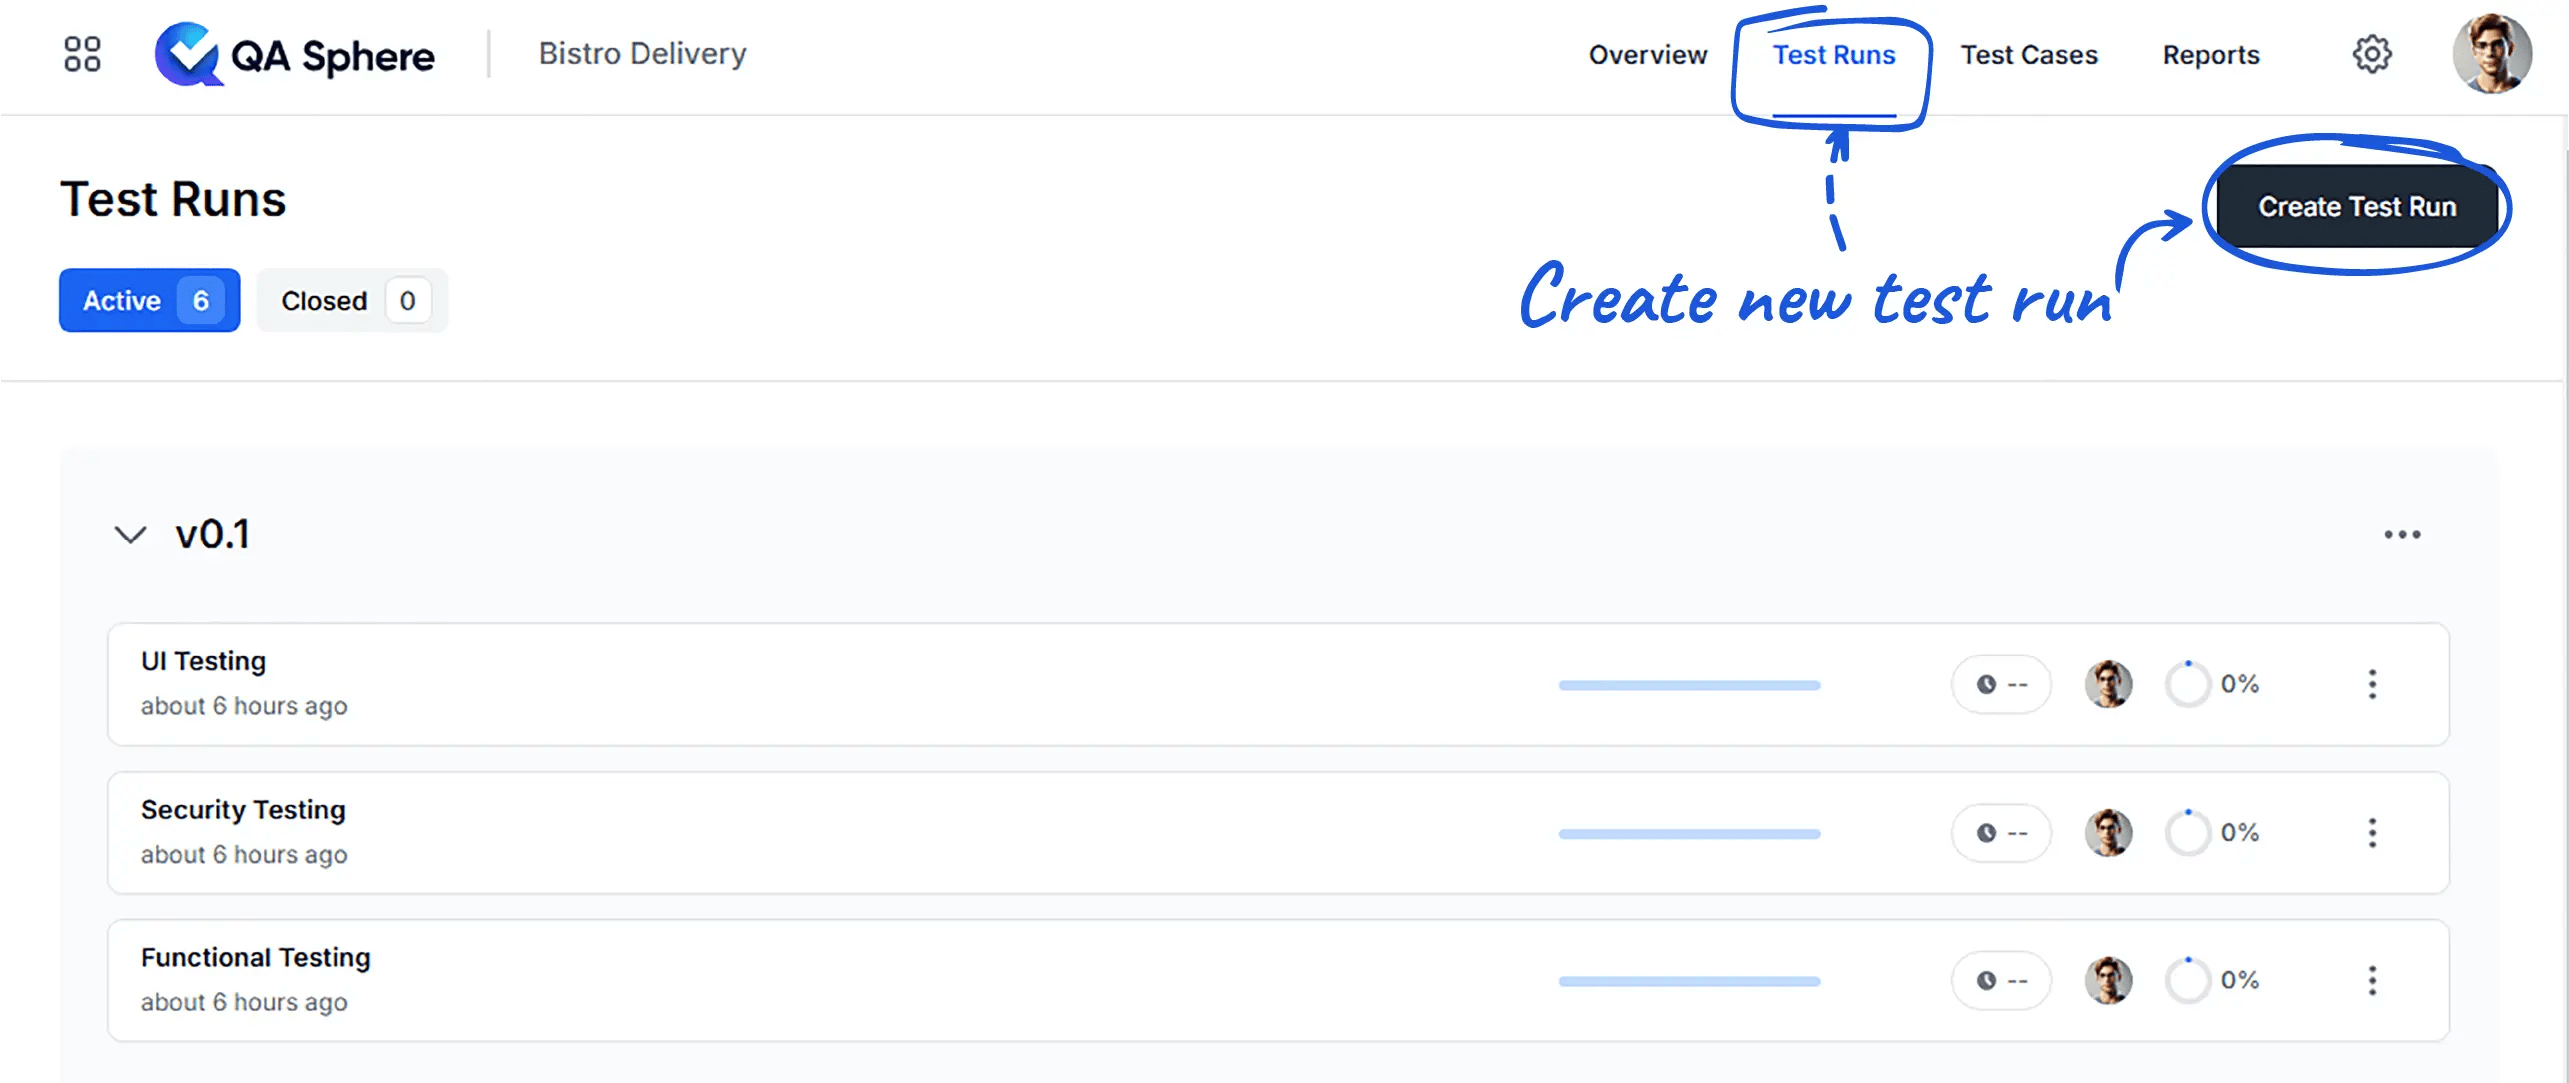
Navigate to the Test Runs section and click Create Test Run.
-
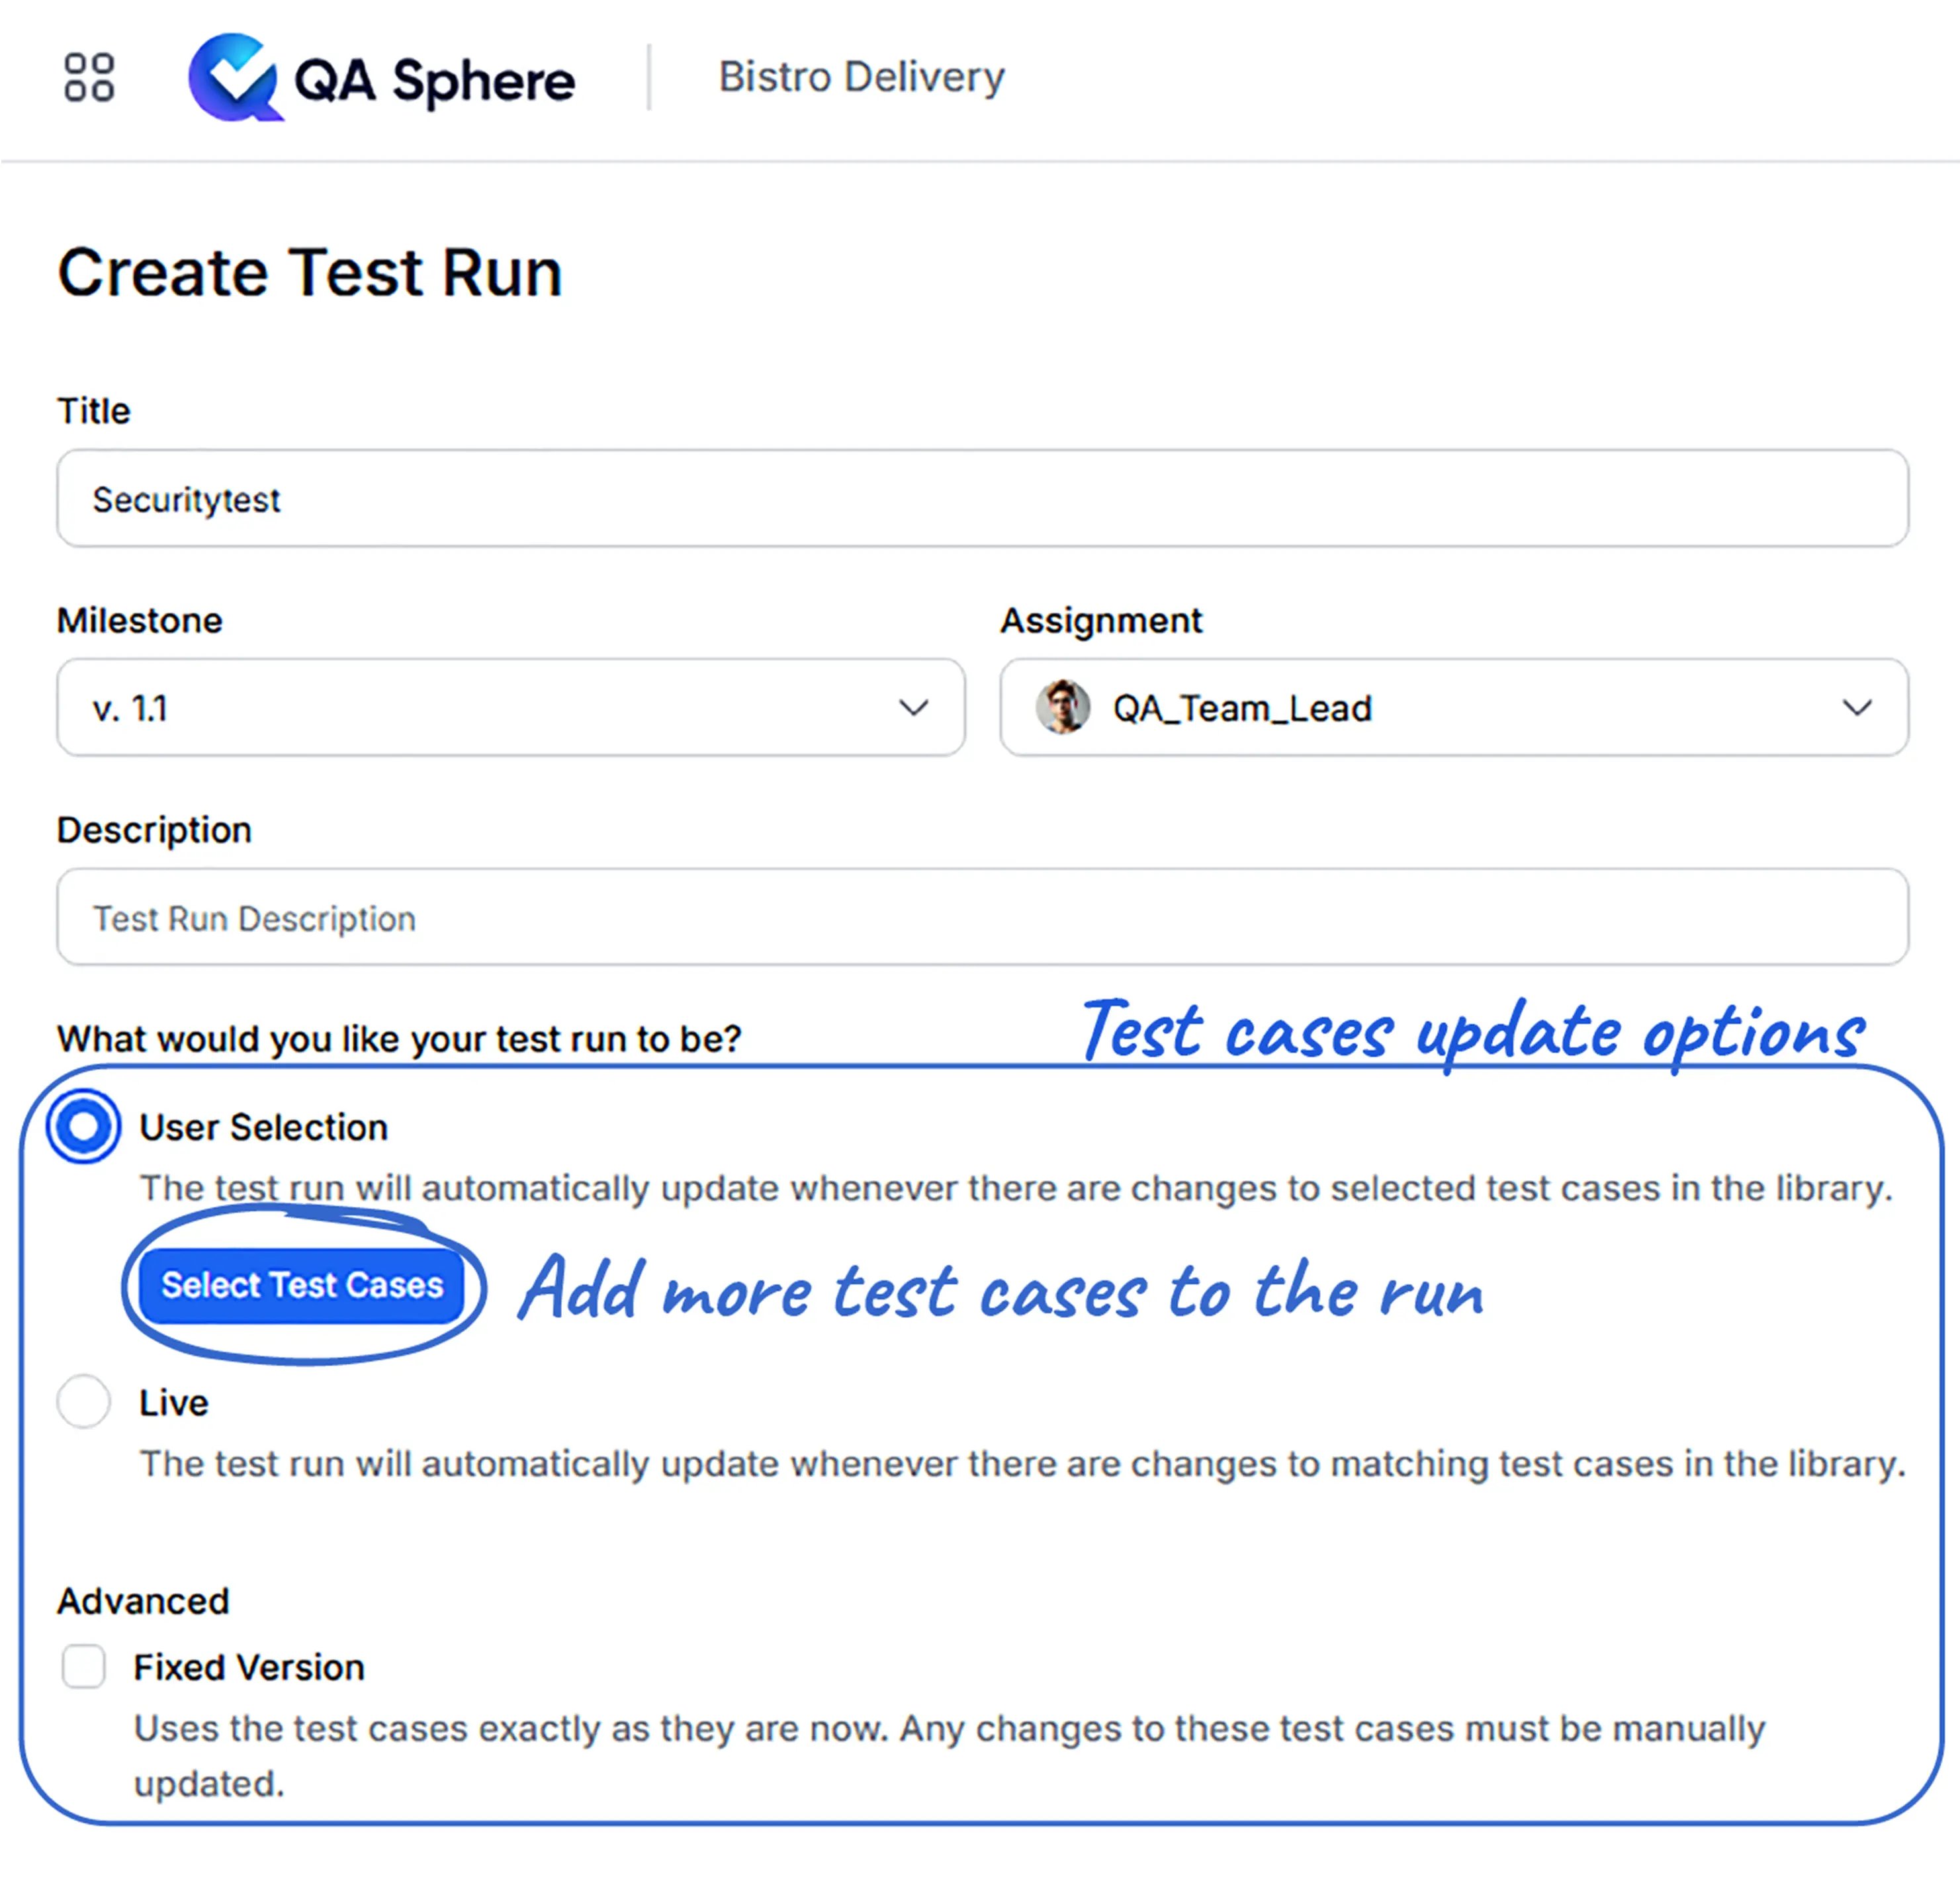
Name and describe the test run, assign a team member, and select a milestone.
-
Select the test cases update option:
- Choose User Selection to pick test cases individually.
- Live mode builds test runs based on the test case folder structure.
NOTE: In both modes, the test run will update when test cases are modified in the library.
- Select Fixed Version to preserve the current state of test cases regardless of future modifications in the library.
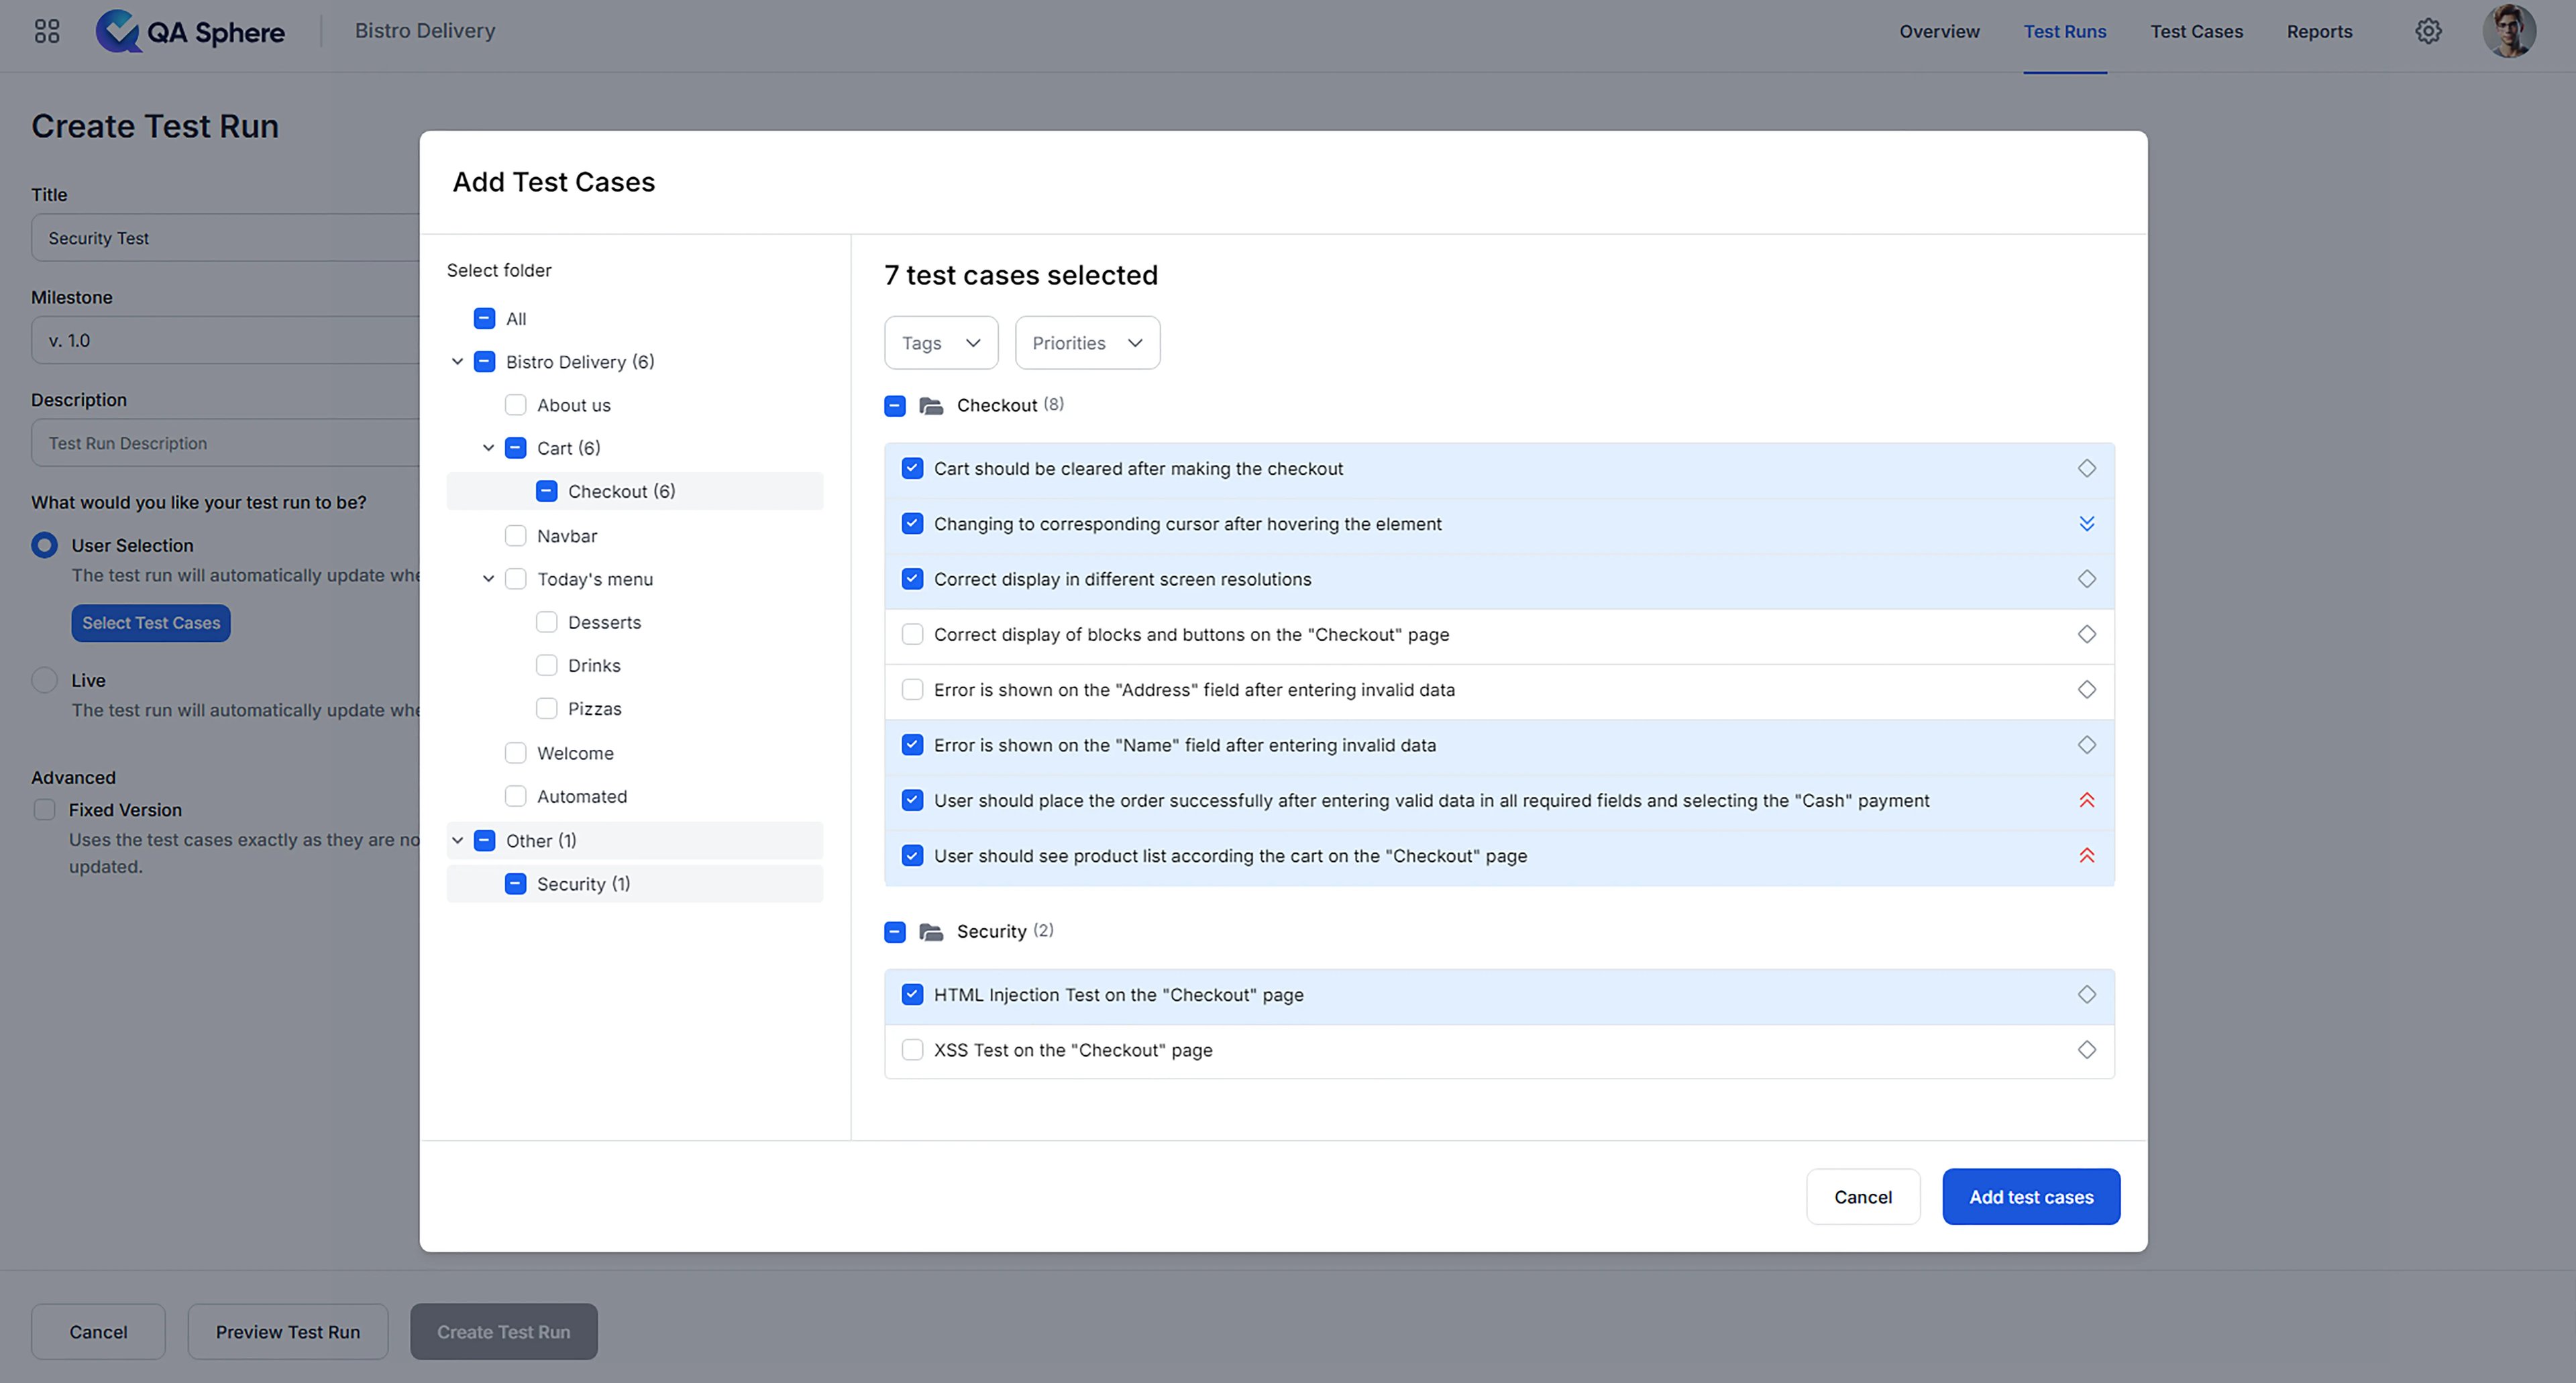
- Select test cases for the test run, review the preview if needed, and click Create Test Run to finalize.
Executing Test Runs
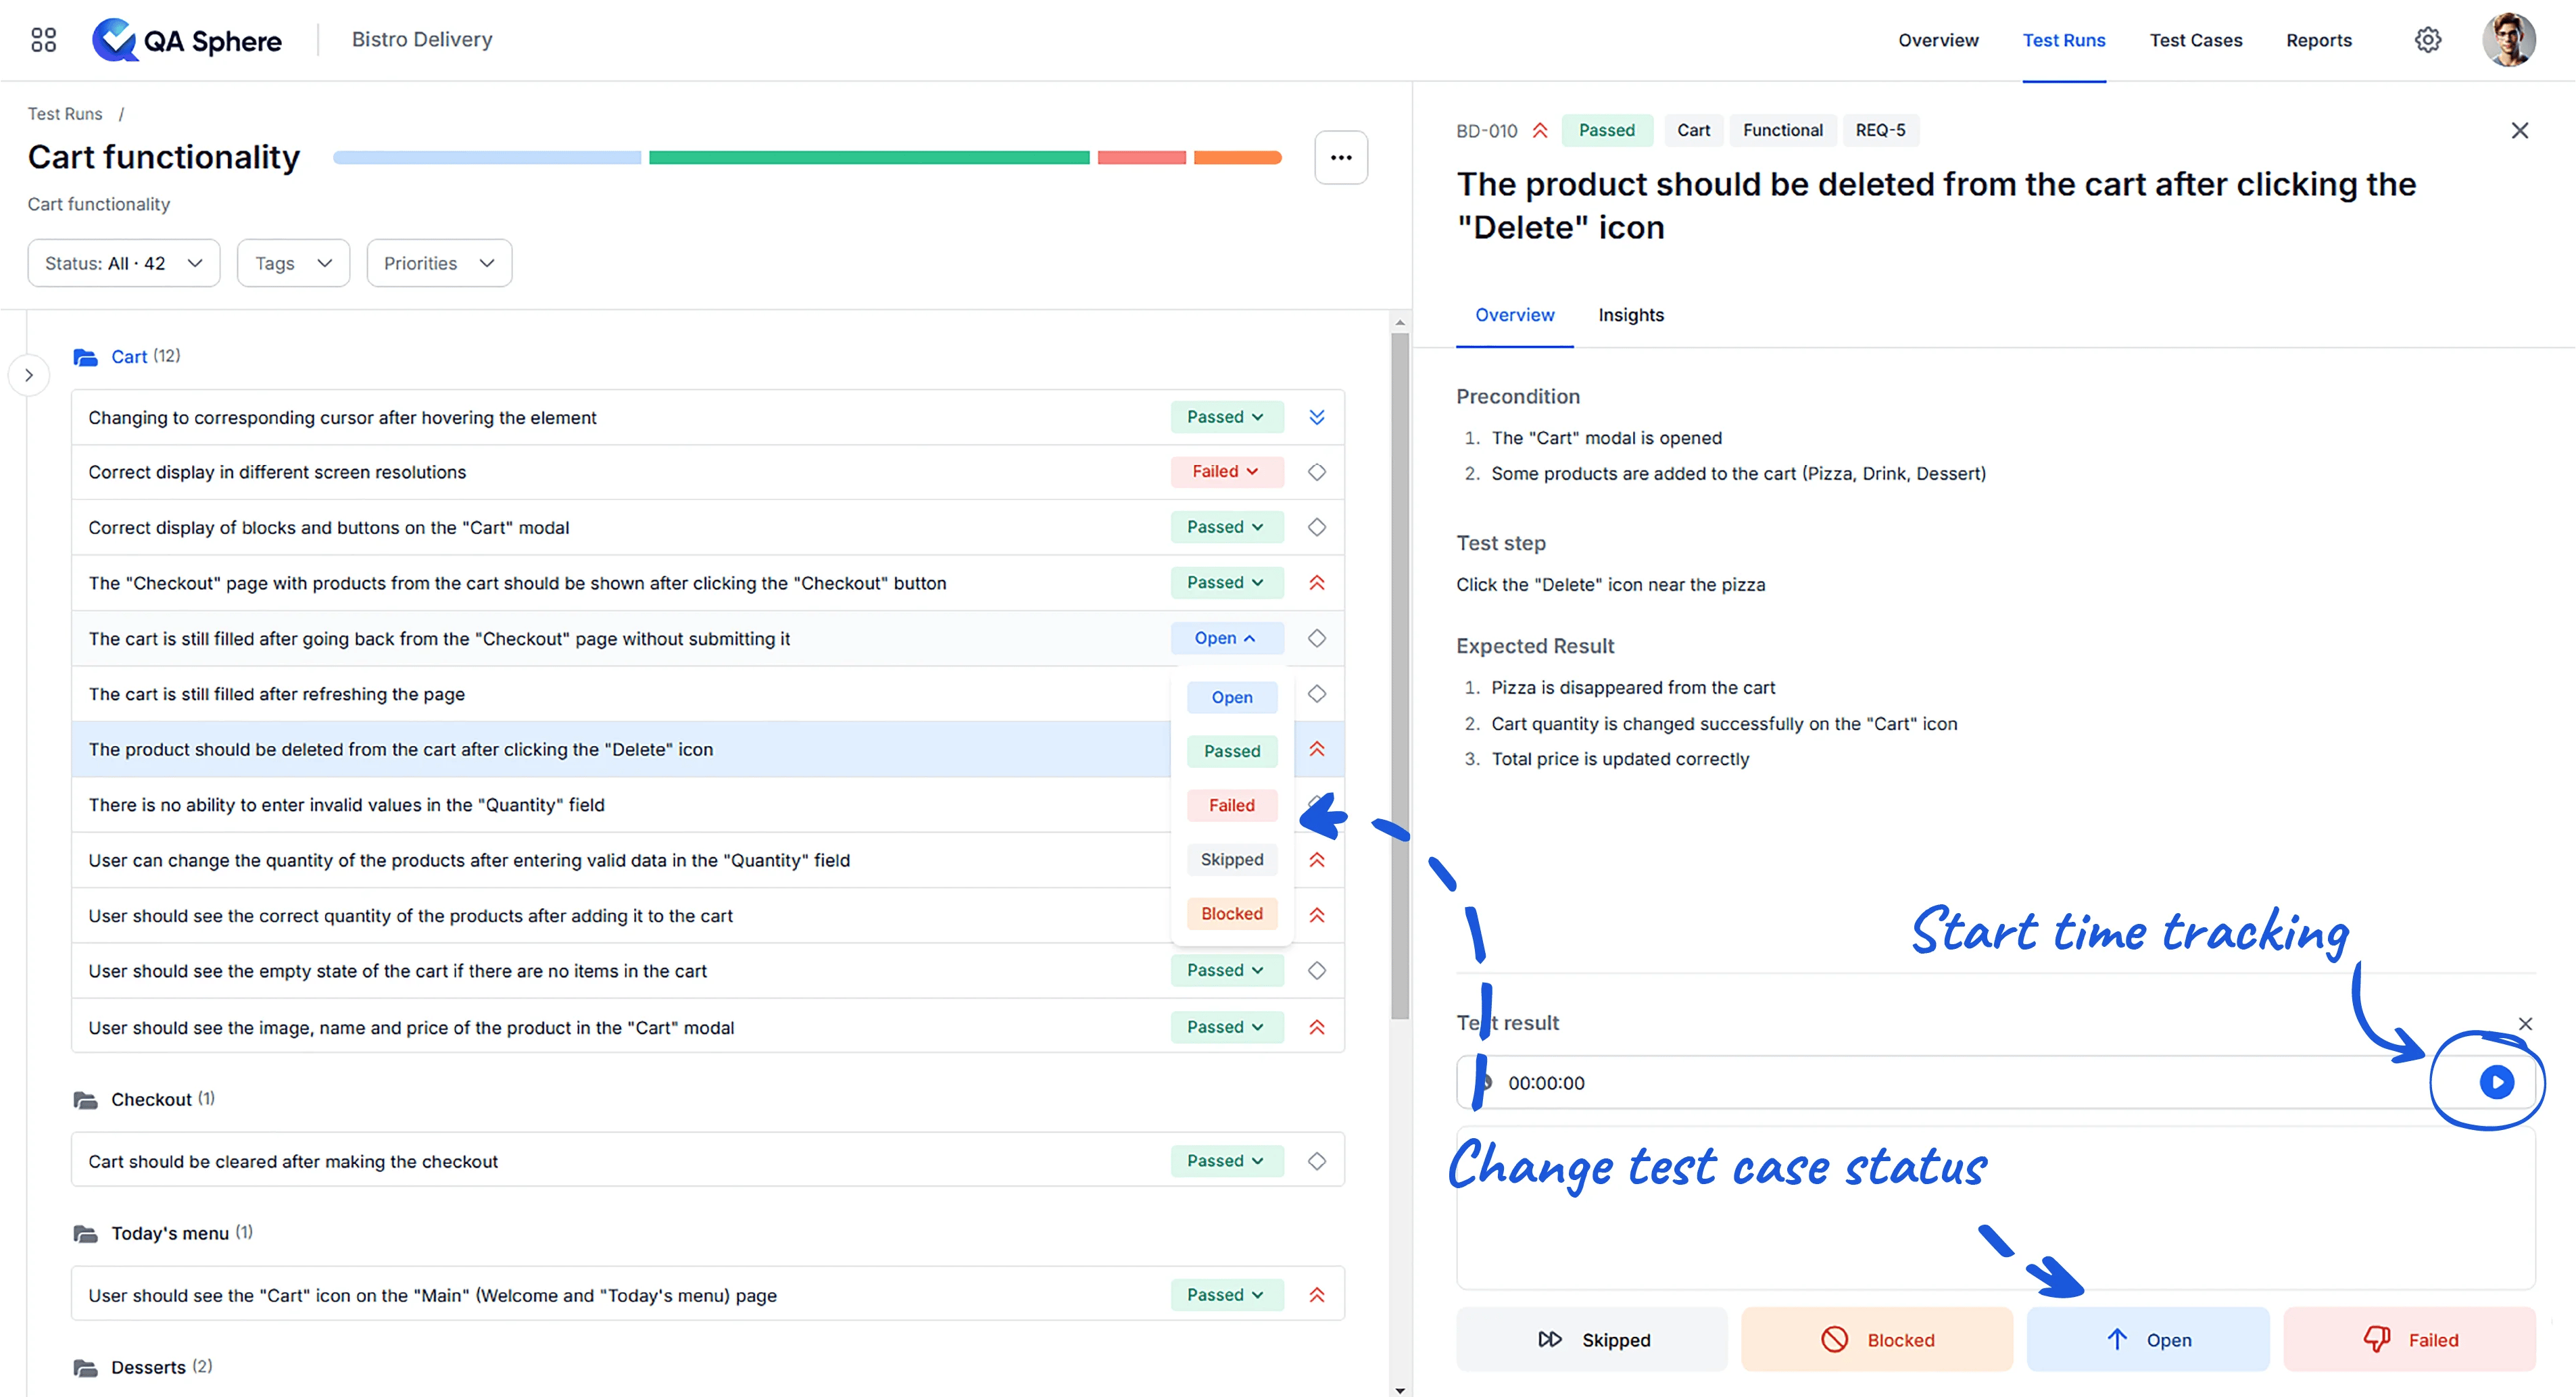
- Start the test run by clicking on it.
- Follow the instructions for each test case.
- Mark the status of each test case based on results.
- Track time spent on individual test cases.
Reviewing Results
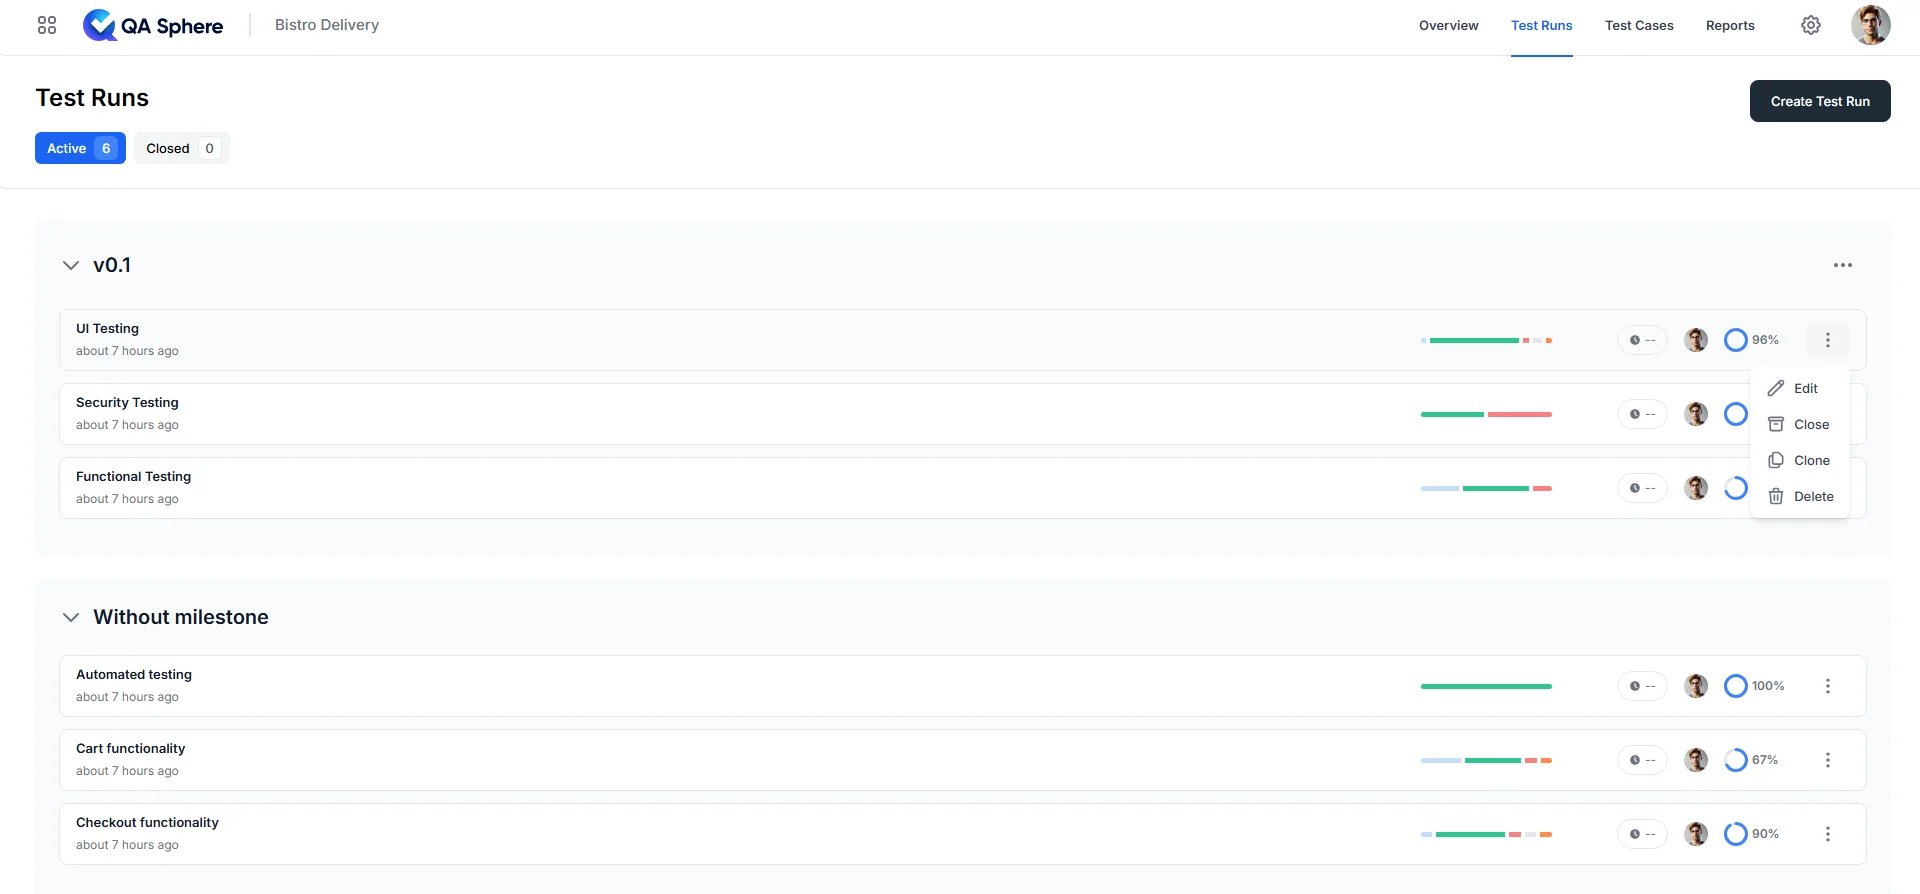
- Once the status of all test cases is updated, the test run can be closed.
- All test run details are automatically saved and can be reviewed later.
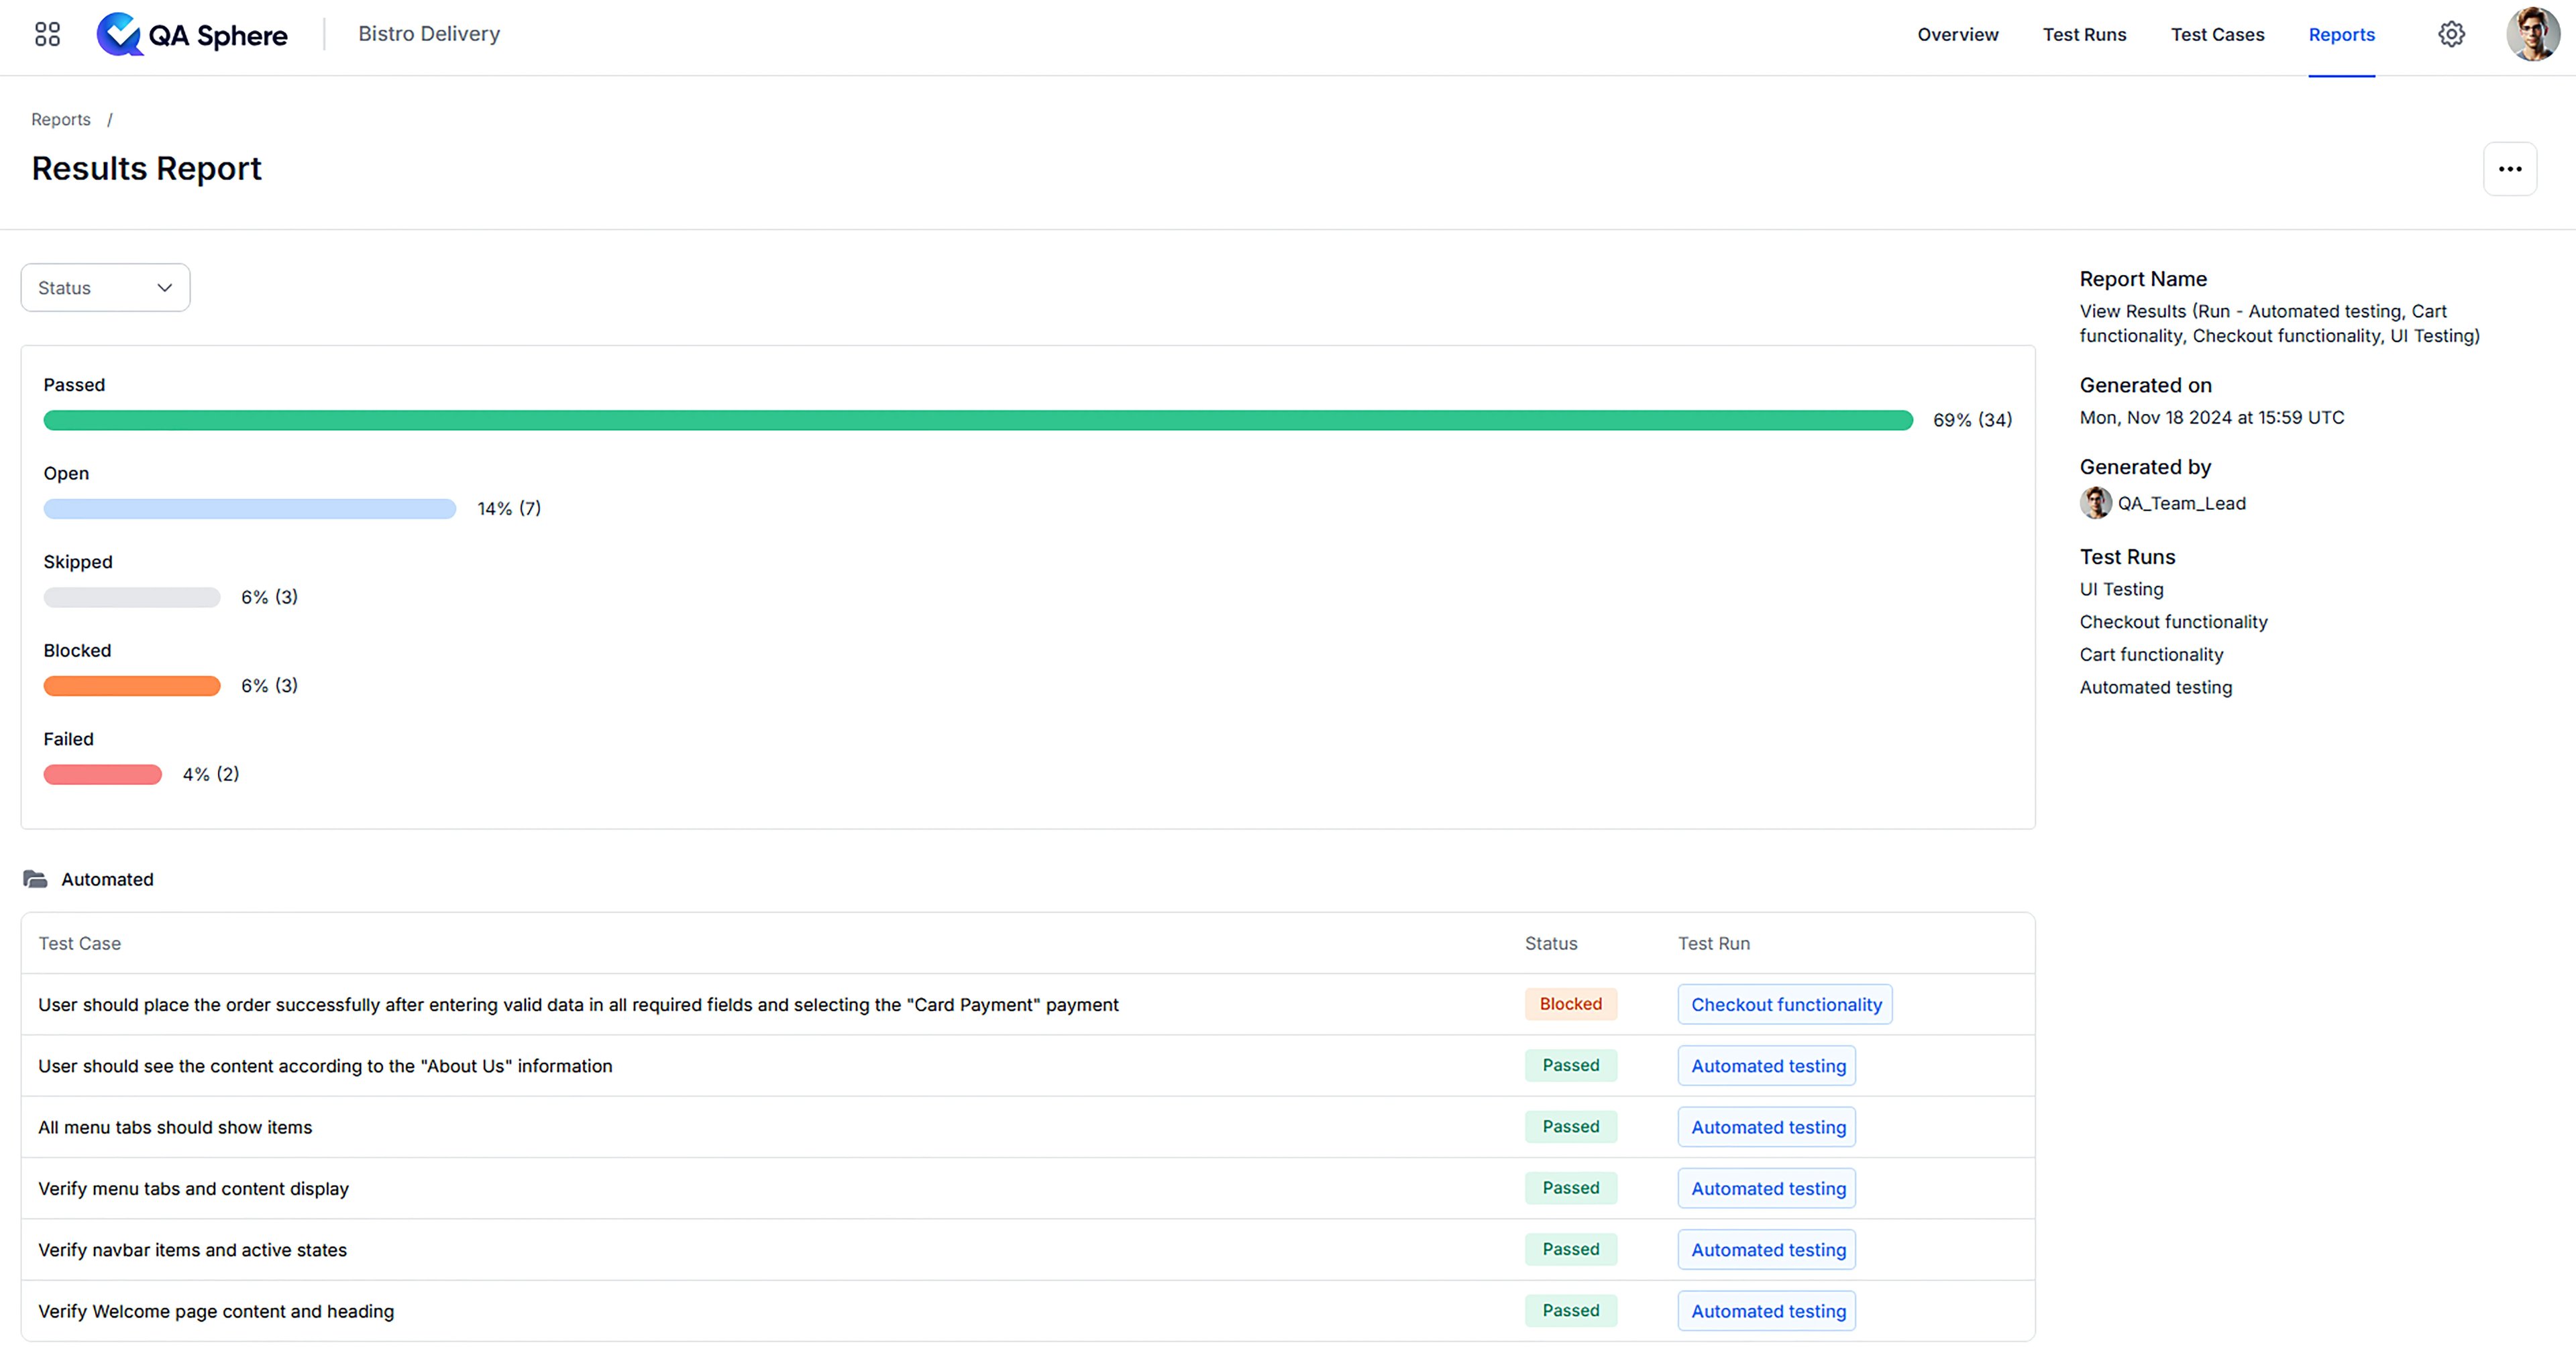
- Detailed reports can be generated out of the test runs' data.
By following these steps, you'll be well on your way to effectively using QA Sphere for testing your products.
Where to Next
- Test Run Configuration — flexibility options, milestones, and running a test run with several testers at once
- Test Plans — group related runs when you need the same suite across several browsers or environments
- AI Features — bulk generation, the test case assistant, duplicate detection, and AI rules
- Reports — turn run data into status, coverage, and effort reporting
- Import & Export — bring an existing library in from CSV or another test management system
- Integrations — connect an issue tracker, Slack, and your CI pipeline