Test Automation Integration with QA Sphere CLI Tool
Setting Up Automated Tests
Cloning the bistro-e2e Repository
The bistro-e2e repository contains Playwright tests that verify the functionality of the Bistro Delivery website.
# Clone the repository
git clone https://github.com/Hypersequent/bistro-e2e.git
cd bistro-e2e

# Install dependencies
npm install
npx playwright install
Running the Tests
The tests are written in TypeScript using Playwright. They're configured to generate JUnit XML reports that we'll later upload to QA Sphere.
npx playwright test
After running the tests, you'll find the results in junit-results/results.xml. The XML file includes:
- Test case names matching QA Sphere's format (BD-XXX: Description)
- Test execution results
- Screenshots as attachments
- Execution time and other metadata
Using QAS-CLI to Upload Results
Installing QAS-CLI
Via NPM (Recommended)
npm install -g qas-cli
Via source code
- Clone the repository:
git clone https://github.com/Hypersequent/qas-cli.git
cd qas-cli

# Install dependencies and build
npm install
npm run build
npm link
- Verify the installation:
qasphere --version
Configuring Environment Variables
The CLI requires two environment variables to be configured:
QAS_TOKEN- QA Sphere API tokenQAS_URL- Base URL of your QA Sphere instance
- Generate an API token:
- Go to QA Sphere Settings
 > API Keys
 - Click Generate New Token
- Copy the token value
- Go to QA Sphere Settings
- Also copy your QA Sphere URL from the browser's address bar
- Configure the variables using one of these methods:
Method 1: Configuration File (Recommended)
Create a .qaspherecli file in your bistro-e2e project directory:
# .qaspherecli
QAS_TOKEN=your_token
QAS_URL=your_qa_sphere_url

# Example with real values:
# QAS_TOKEN=tst0000001.1CKCEtest_JYyckc3zYtest.dhhjYY3BYEoQH41e62itest
# QAS_URL=https://qas.eu1.qasphere.com
Method 2: Environment Variables
Export the variables in your shell:
export QAS_TOKEN=your_token
export QAS_URL=your_qa_sphere_url
Check QA Sphere Documentation for more details.
Uploading Test Results
You have two options for uploading test results:
Option 1: Automatic Test Run Creation (Recommended)
Simply run the following command, and QAS-CLI will create a new test run automatically:
qasphere junit-upload ./junit-results/results.xml
Option 2: Upload to an Existing Test Run
If you want to use an existing test run:
-
Navigate to your project's test run in QA Sphere:
- Go to your project
- Click Test Runs at the top
- Select your desired test run
- Note the test run URL from your browser's address bar
-
Upload the results using the run URL:
qasphere junit-upload -r https://your-instance.region.qasphere.com/project/BD/run/23 ./junit-results/results.xml
The URL structure follows this pattern: https://<domain>.<region>.qasphere.com/project/<project-code>/run/<run-id>
Where:
<domain>: Your QA Sphere account domain (defined during registration)<region>: Your instance's region code (automatically set)<project-code>: Your project identifier (e.g., "BD" for Bistro Delivery)<run-id>: The numeric ID of your test run
For example:
https://mycompany.eu1.qasphere.com/project/BD/run/23
Note: When using an existing test run, make sure to use the exact URL from your browser's address bar when executing the command.
The tool will:
- Create a new test run automatically (if no run URL is provided)
- Match test cases based on the BD-XXX references in the names
- Upload test results including pass/fail status
- Include any attachments (screenshots) if you used the --attachments flag
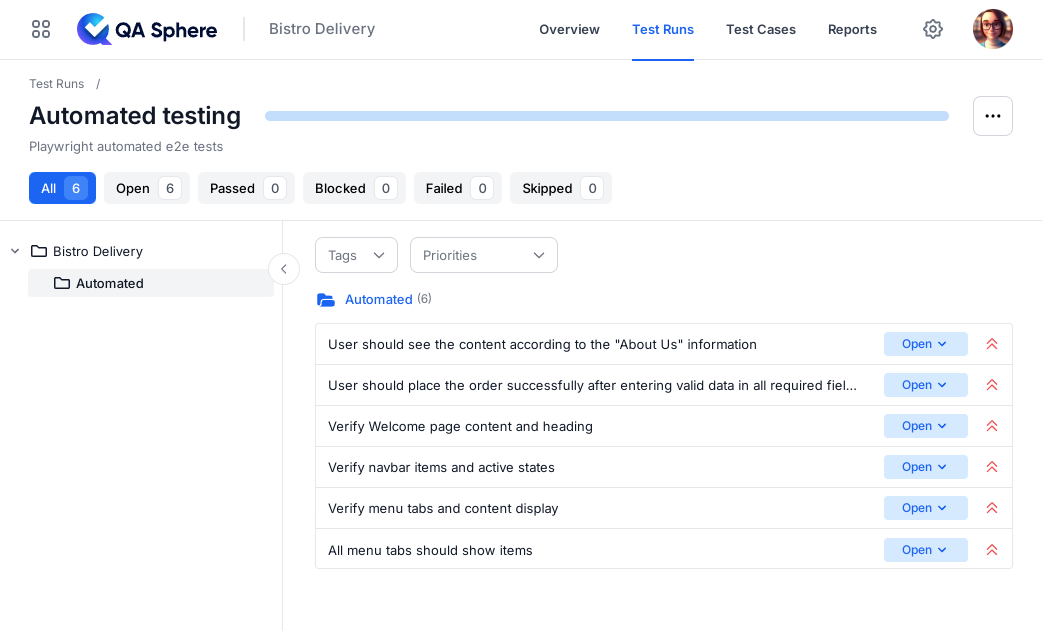
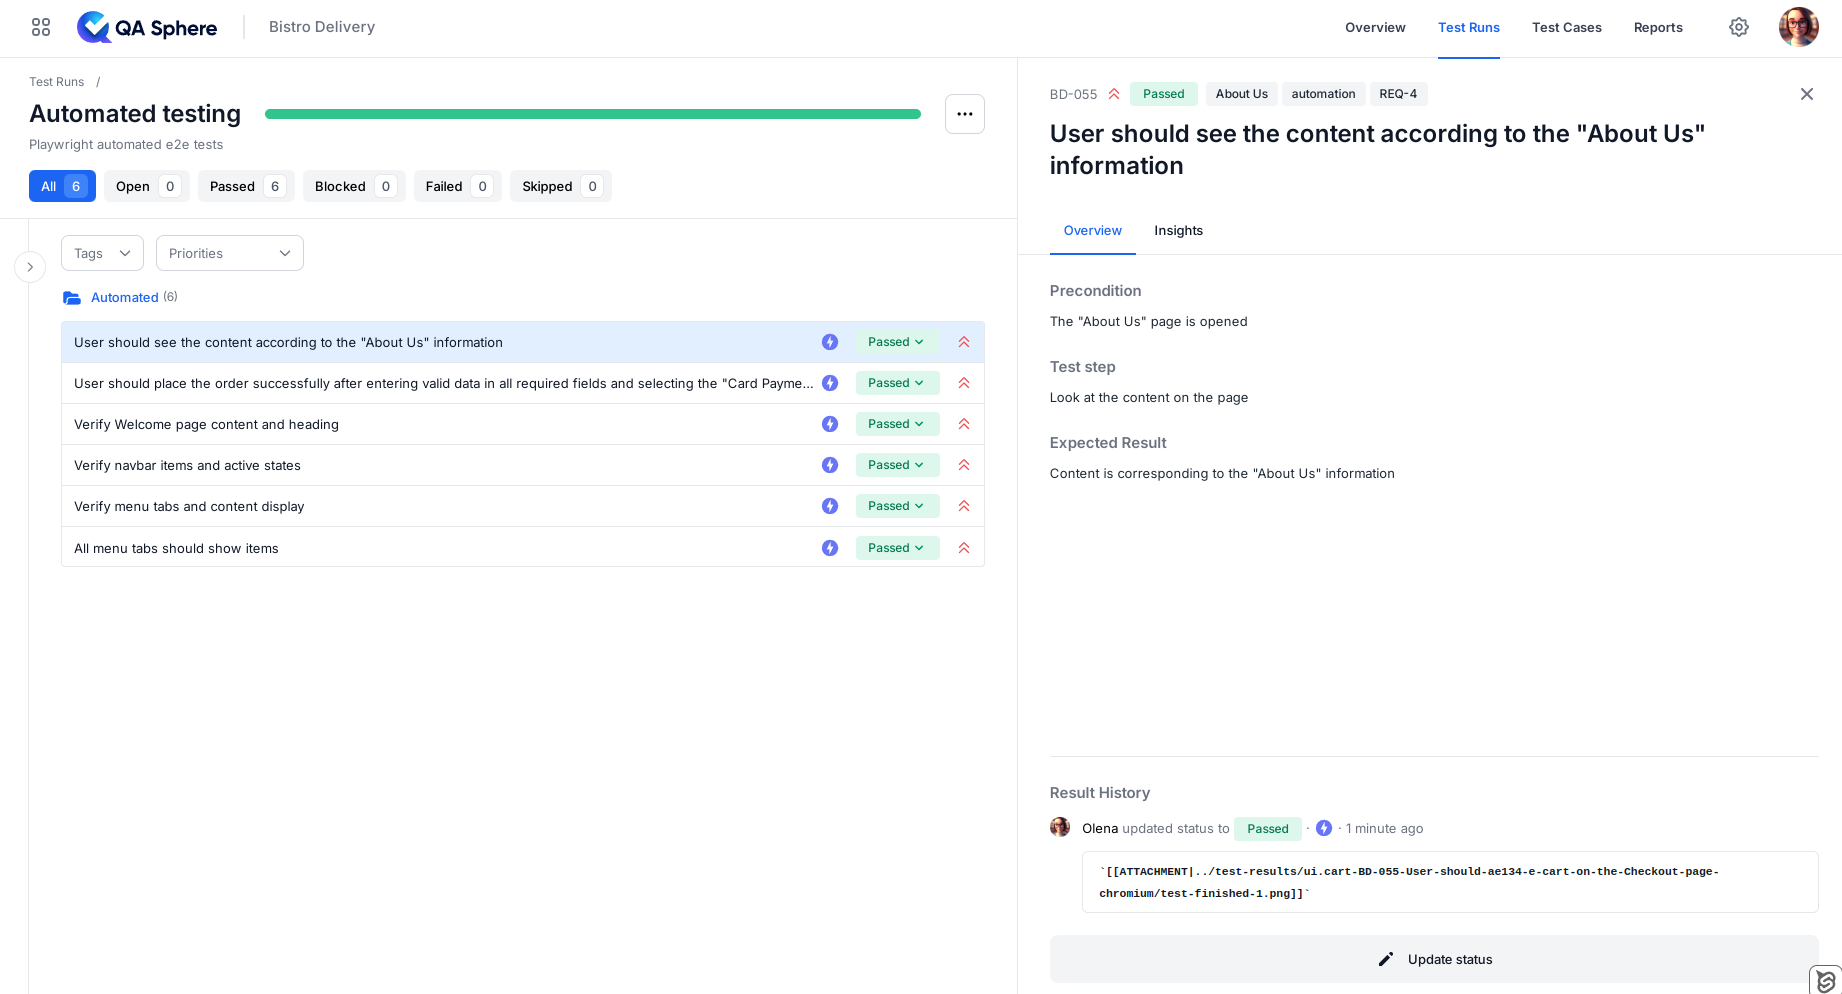
Verifying Results
After uploading, check your test run in QA Sphere. You should see:
- Updated test case statuses
- Automation badge
- Links to screenshots
QAS-CLI Commands Reference
Basic Usage
# Create new test run automatically
qasphere junit-upload <junit-file>

# Upload to existing test run
qasphere junit-upload -r <run-url> <junit-file>
Common Options
-r, --run-url     # Optional URL of existing test run
--attachments     # Include test attachments
--force           # Ignore non-critical errors
--help           # Show help information
Environment Variables
QAS_TOKEN=<your-token>    # API authentication token
QAS_URL=<your-url>        # Base URL of your QA Sphere instance
Written by
QA Sphere TeamThe QA Sphere team shares insights on software testing, quality assurance best practices, and test management strategies drawn from years of industry experience.